How to cook the perfect Christmas turkey
How to cook the perfect Christmas turkey and learn some kitchen science
Click on any photo to see a larger image.
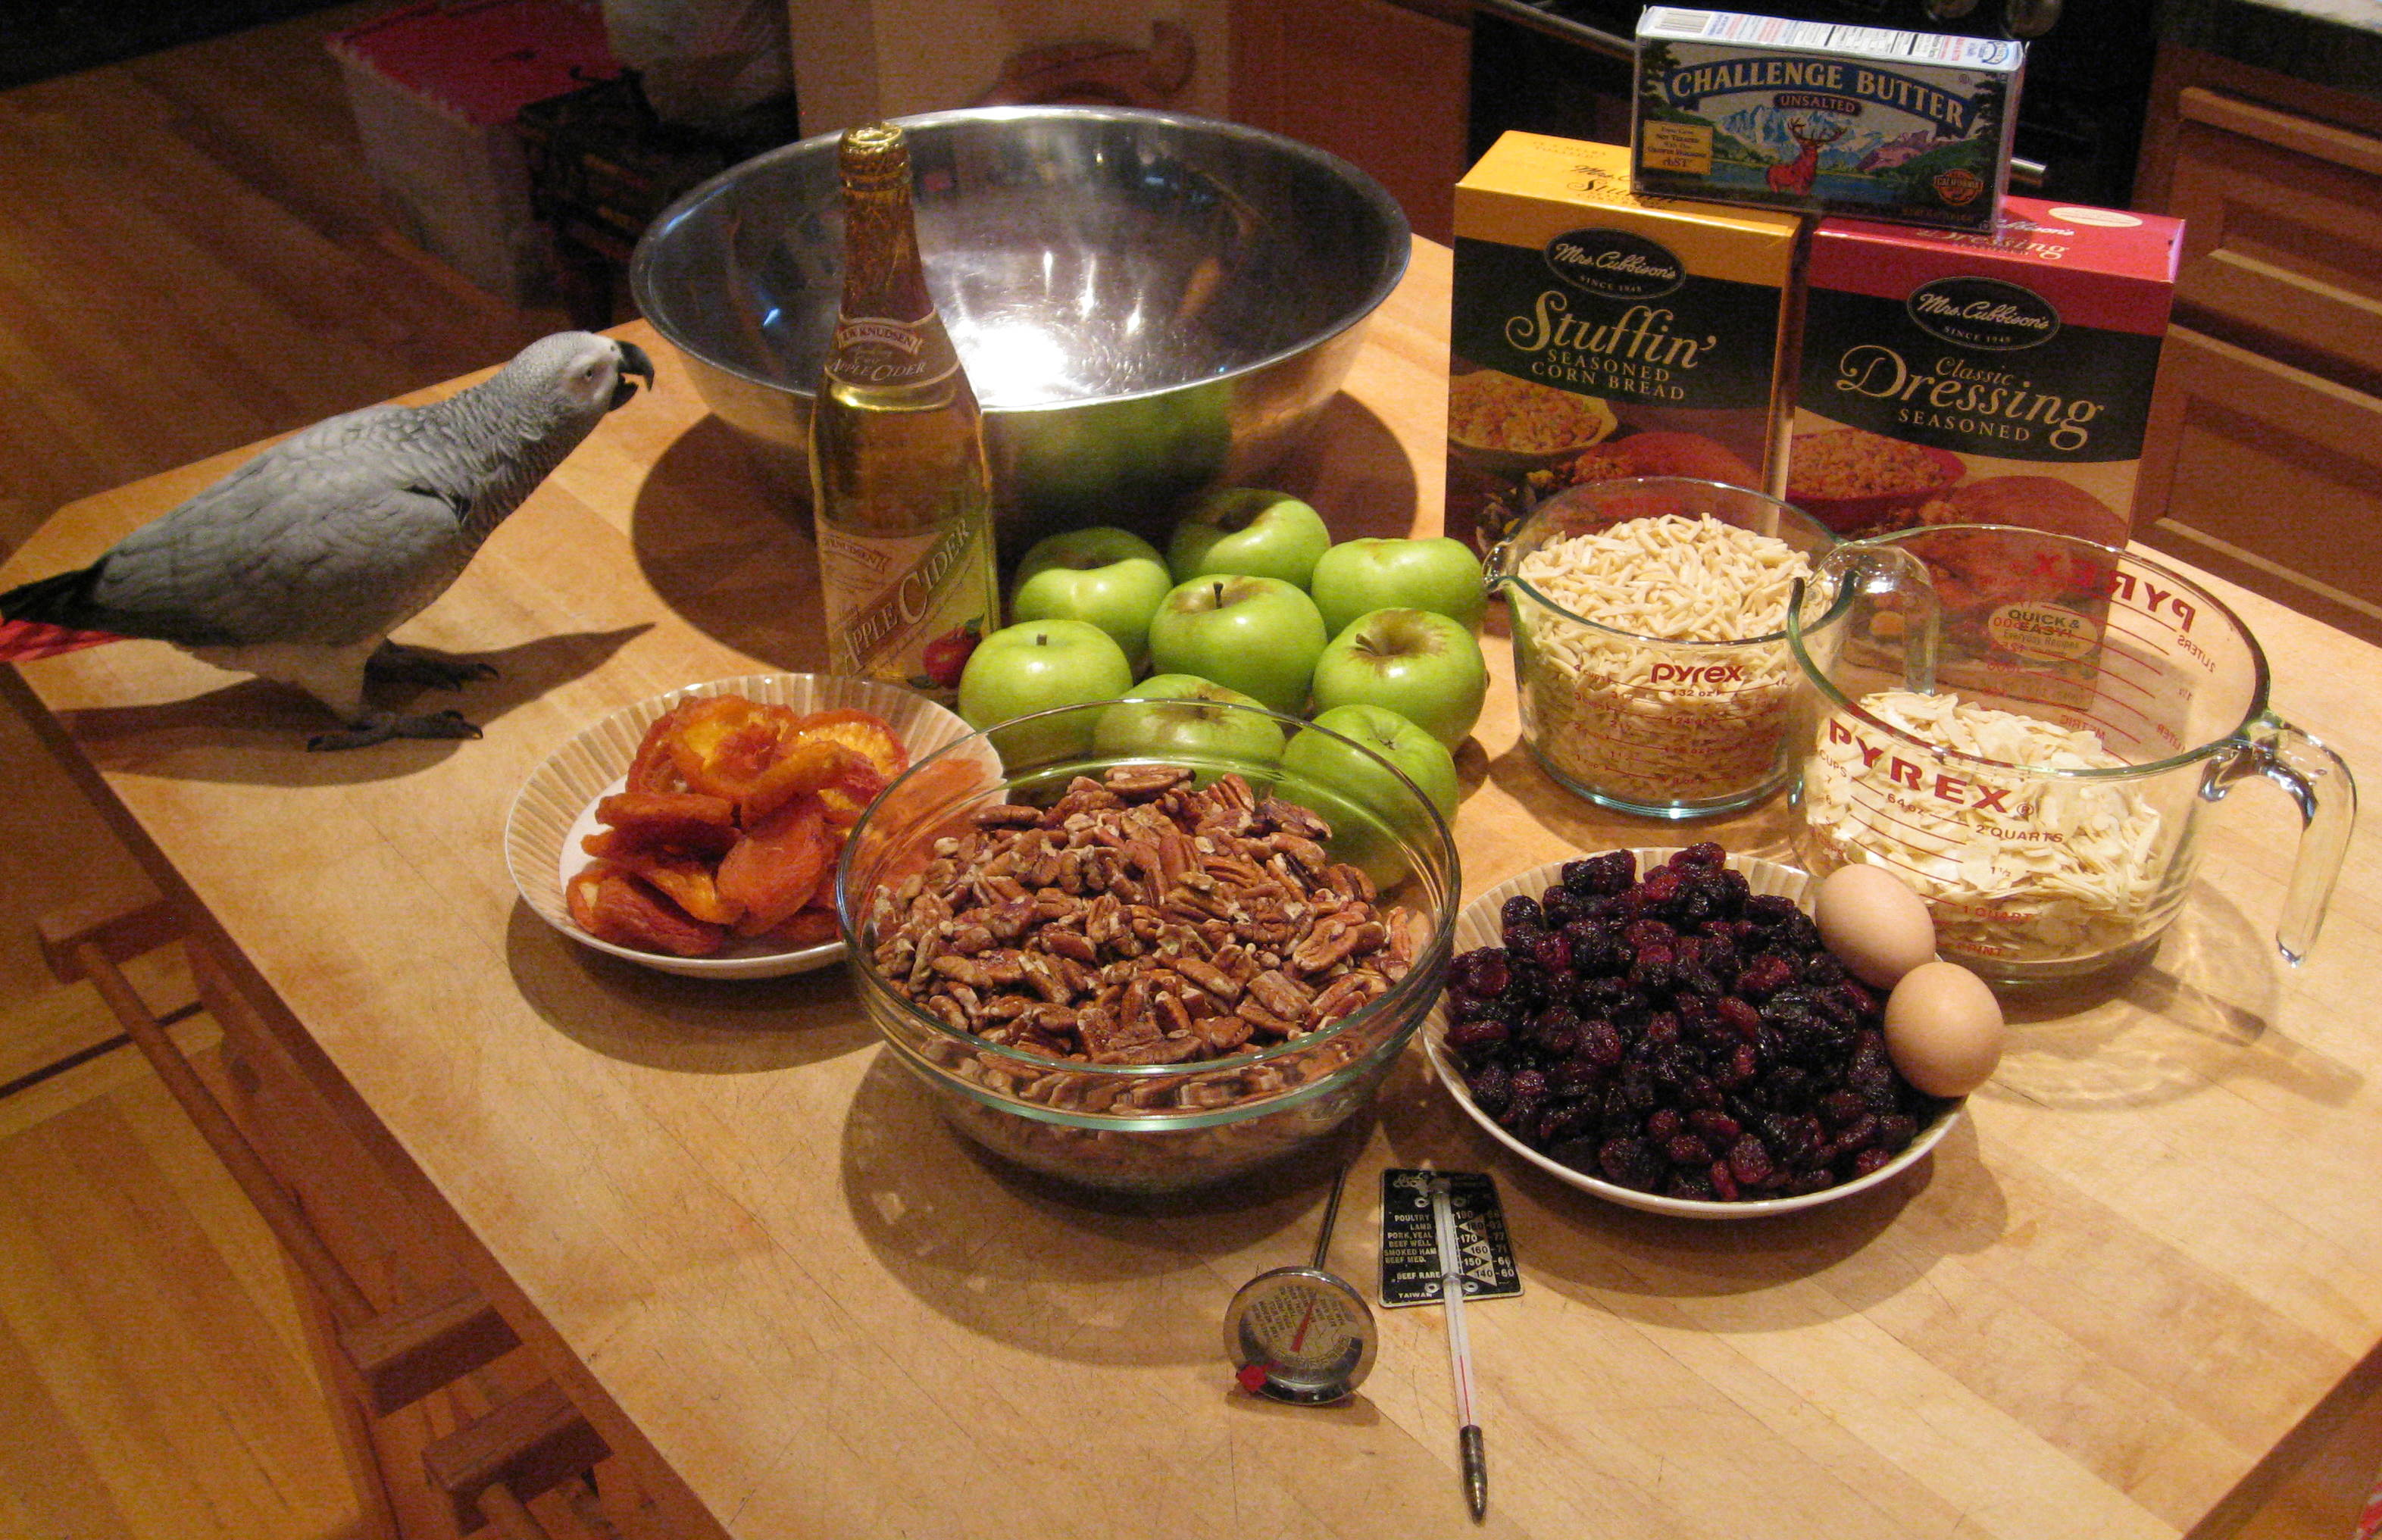
My assistant will help in the preparation, especially in the taste testing as the stuffing progresses.
We get up very early in the morning on the day before we plan to eat the turkey. It will be cooking all day and all night, and most of the rest of the next day.
We will be cooking this bird for an hour a pound. The bird is 36 pounds.
Because we will be cooking at a temperature below boiling, we will be taking some simple steps to ensure that nothing harmful grows in our bird.
Our stuffing will be acidic and sweet, which will prevent bacterial growth. Dried fruits and nuts do not support bacterial growth. Other steps to prevent harmful bacteria will be shown later. These precautions are a good idea no matter how you cook your bird.
We start by assembling the ingredients for the stuffing.
The ingredients are:
- 20 to 40 pound Turkey
- 4 pounds of bacon
- 2 boxes of commercial stuffing mix
- 1 pound of butter
- 4 cups of slivered almonds
- 4 cups of sliced almonds
- 4 cups of pecan halves
- 2 cups of dried cherries
- 2 cups of dried nectarines (or apricots)
- 5 to 8 Pippin apples
- 2 eggs
- 1 quart apple cider (less for a smaller bird)
Melt the butter in a 4 quart Pyrex bowl using the microwave.
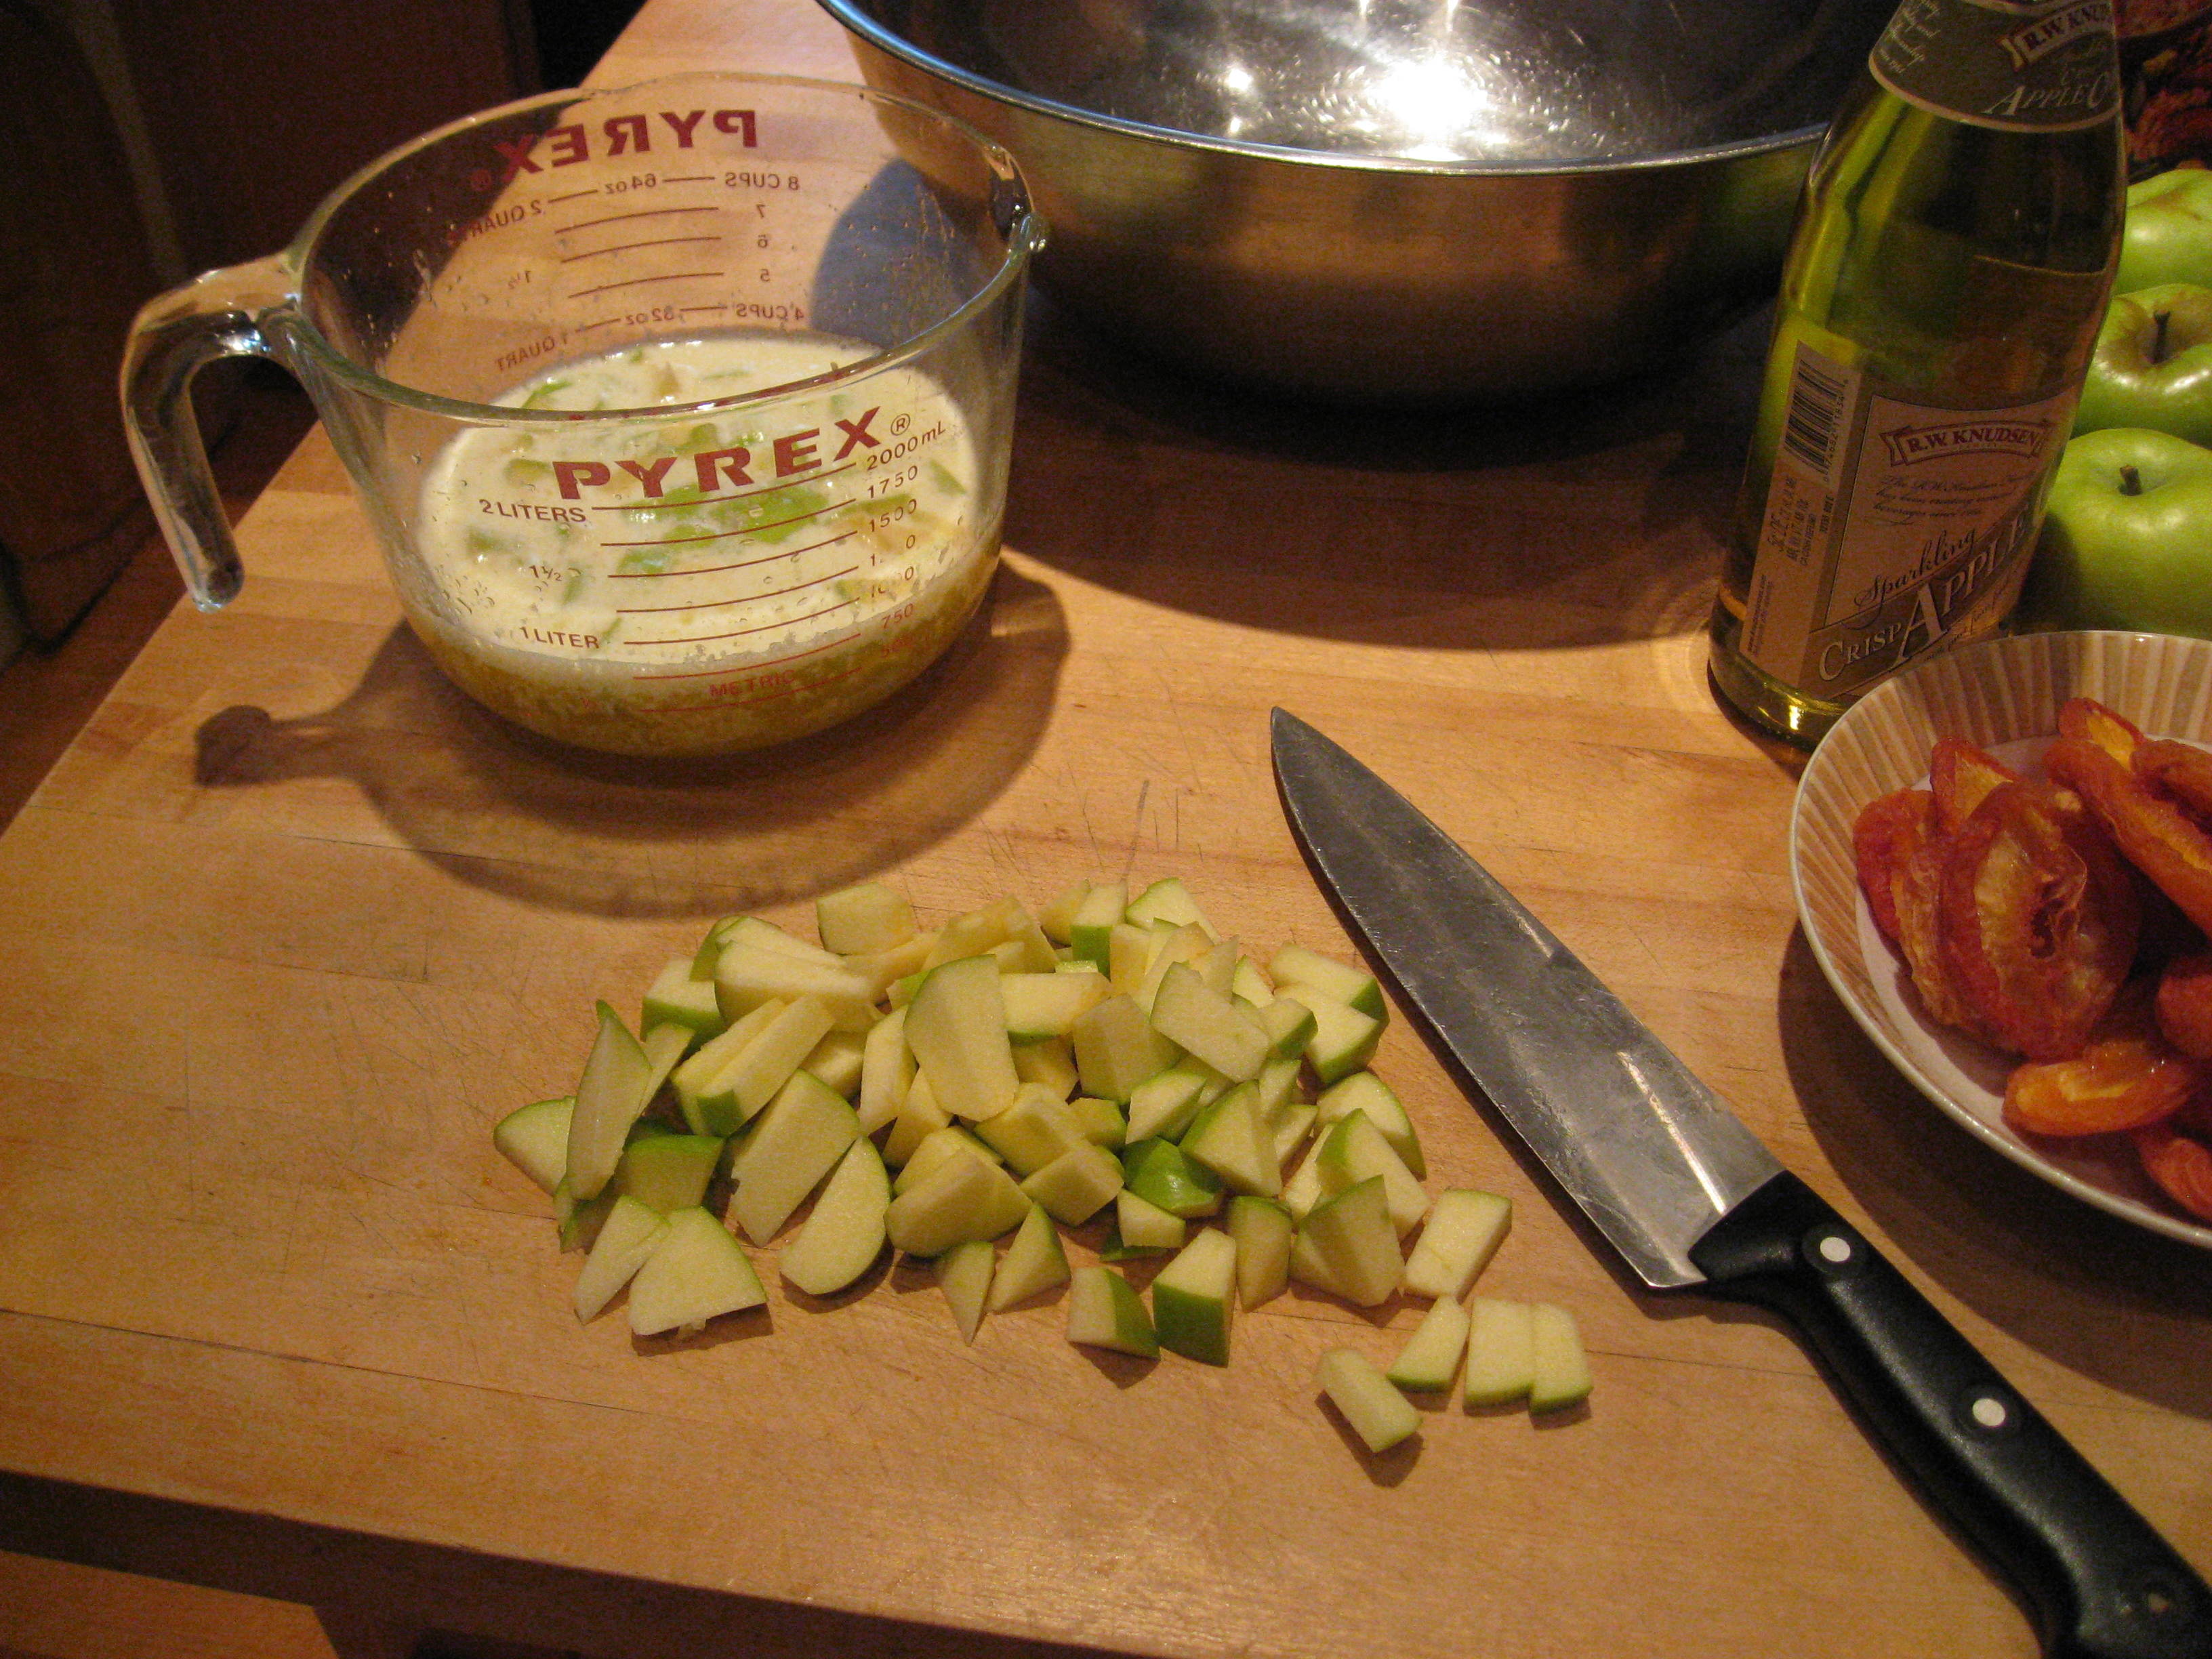
Chop the apples into pieces about the size of a sugar cube. As you chop each apple, put the pieces into the melted butter. This will prevent them from getting brown on the cut edges.

Chop the nectarines into small pieces and add them to the apples.
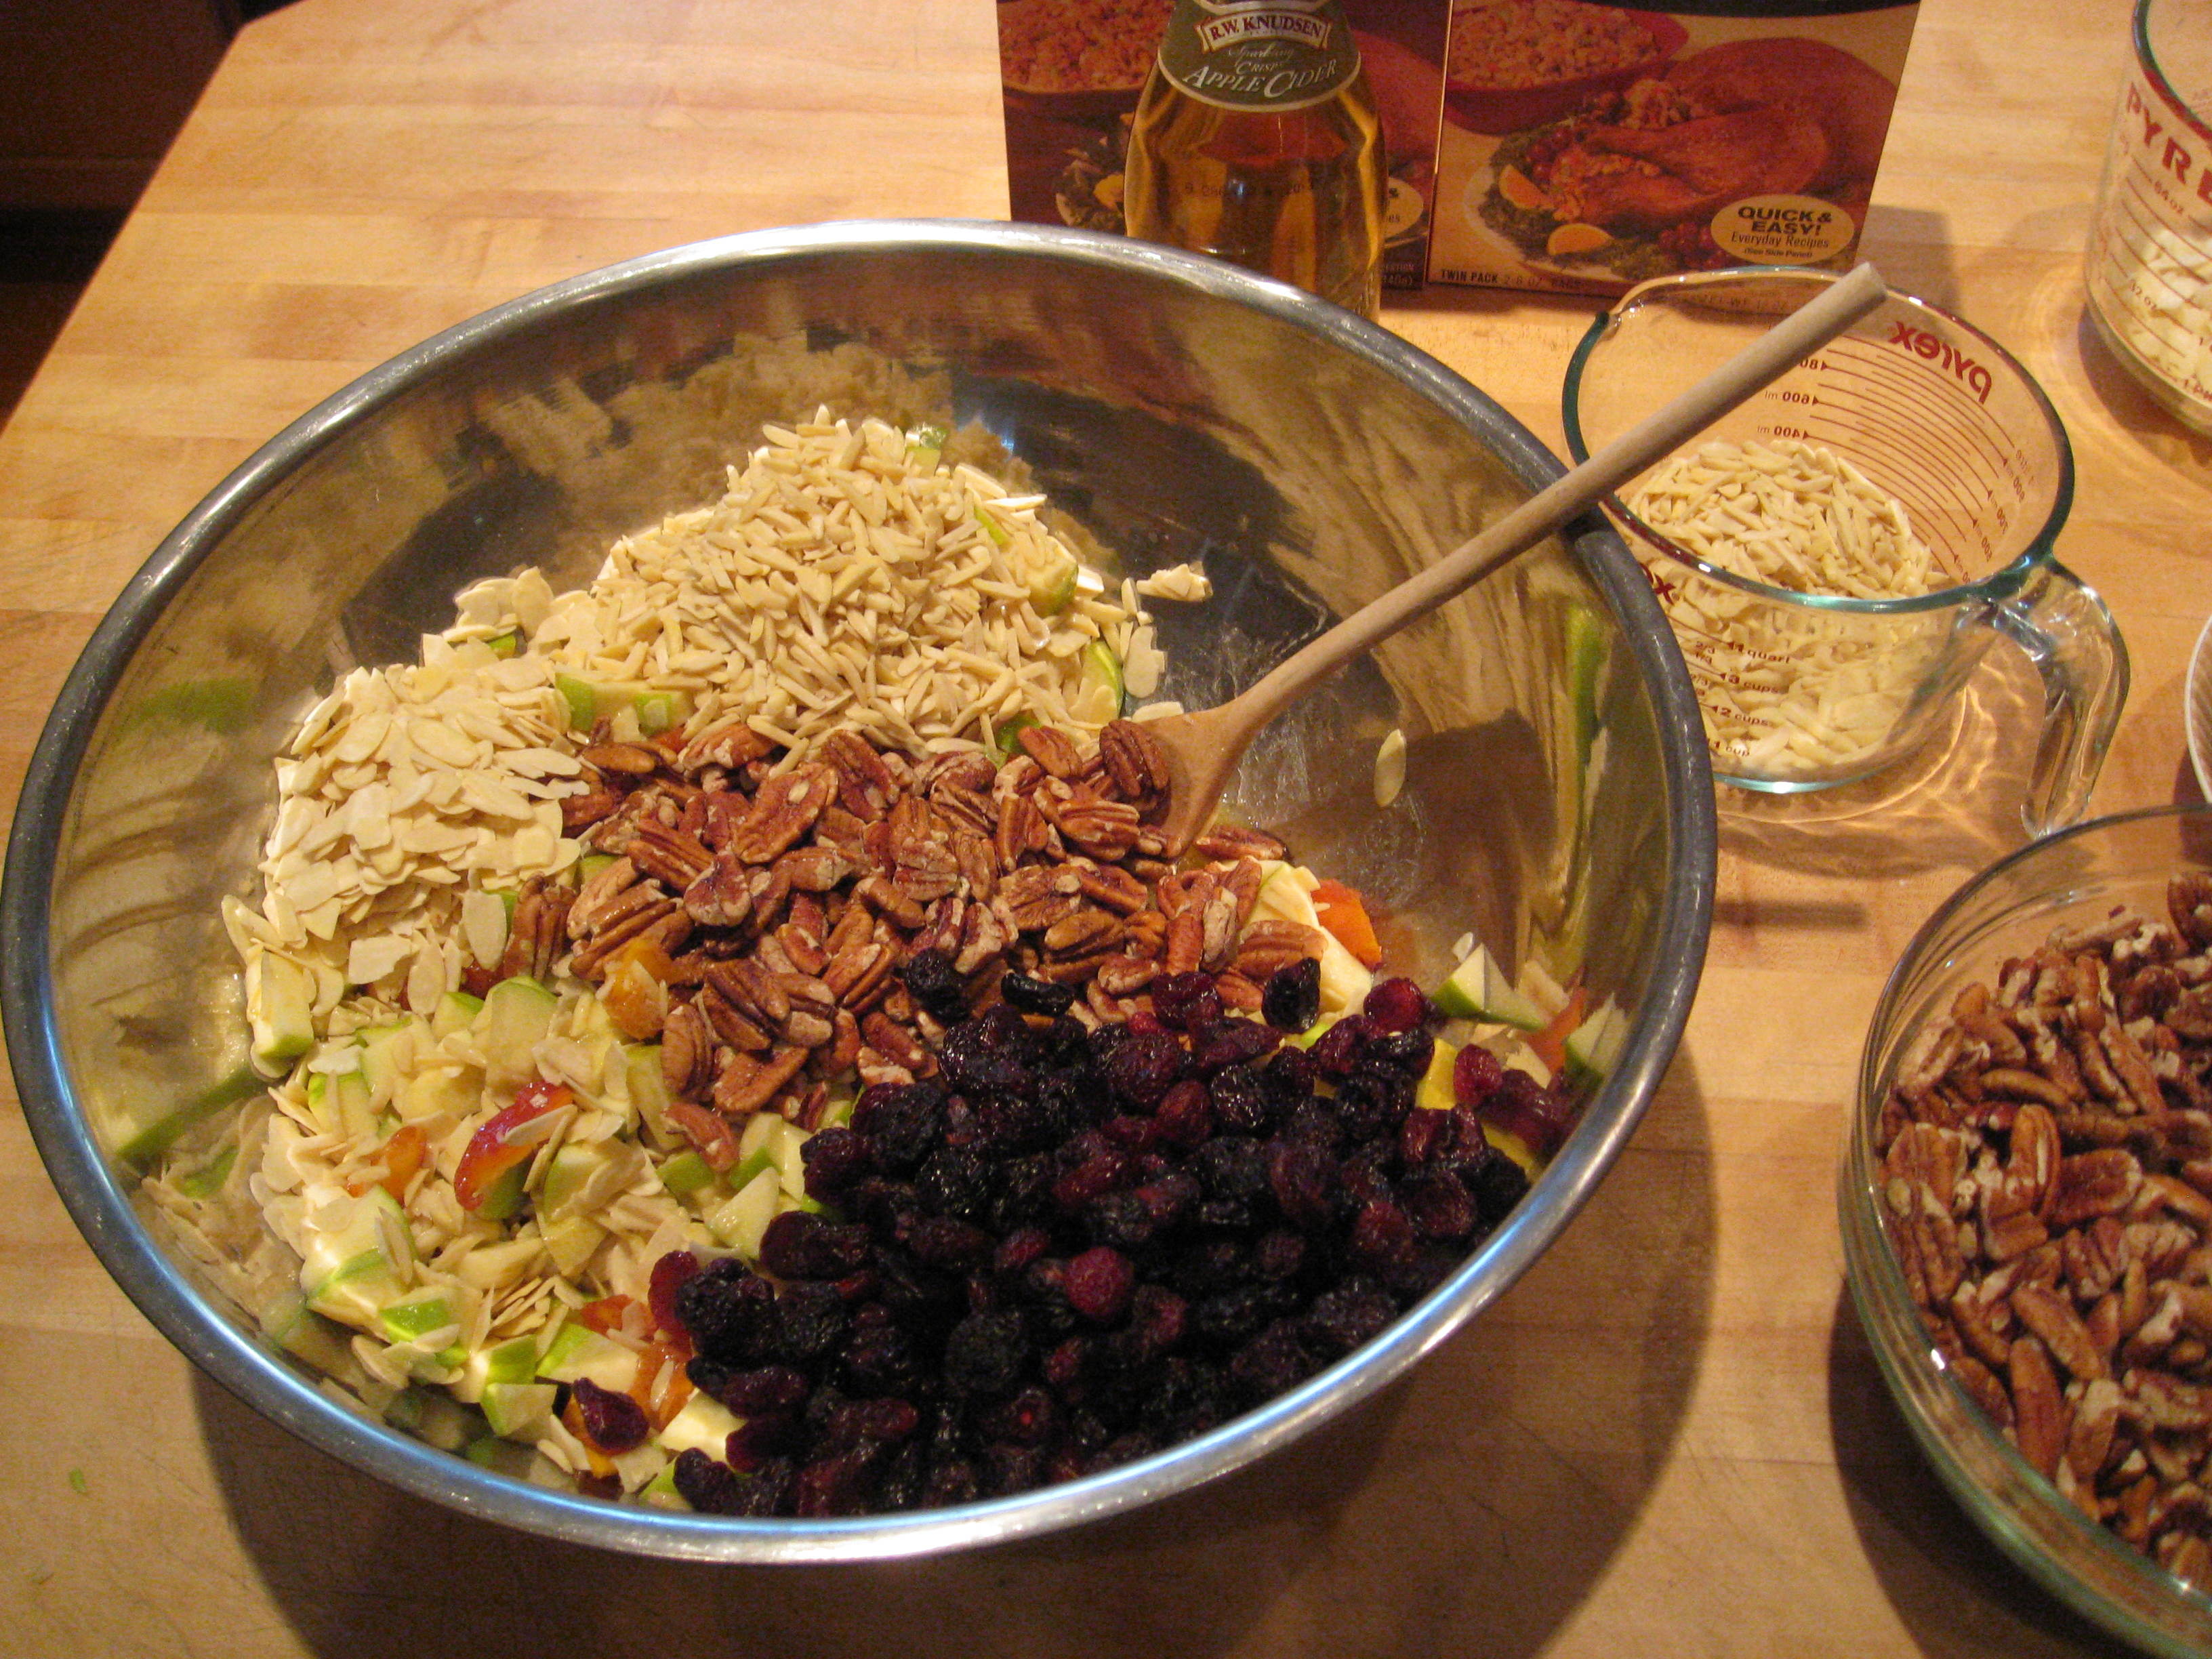 Put the fruits and nuts into a huge bowl.
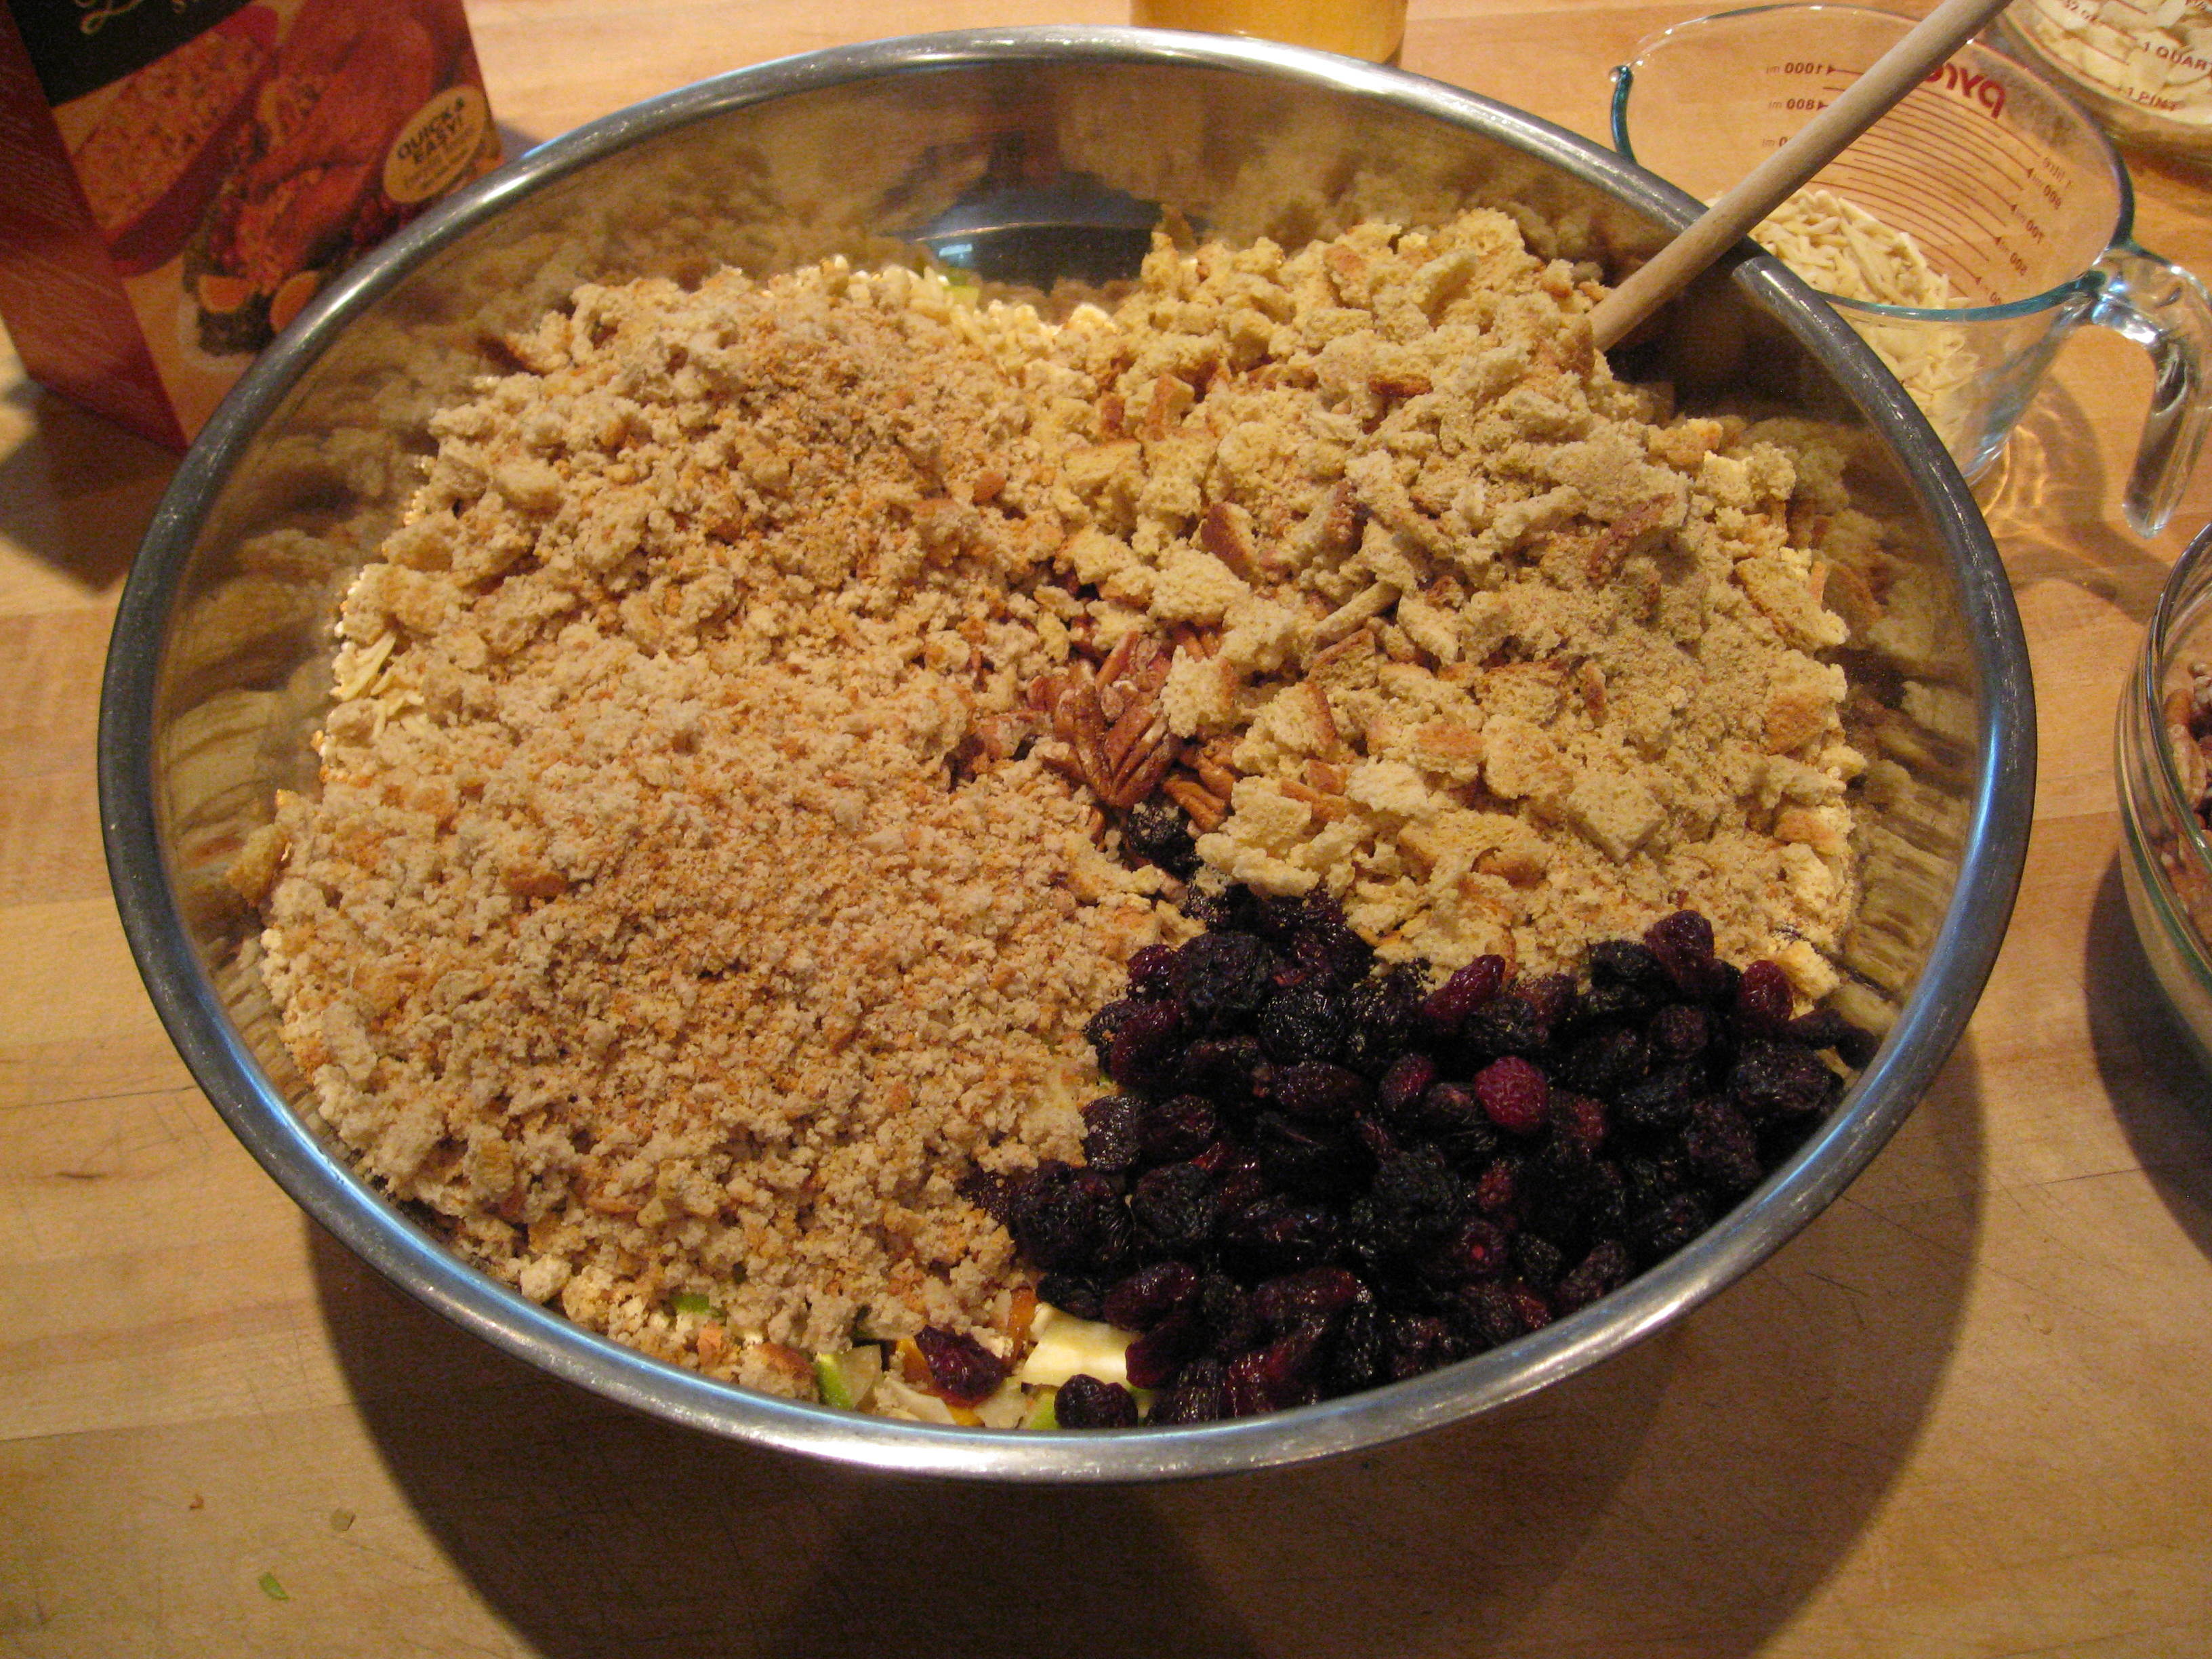
Add the two boxes of stuffing mix. I like to use one box of cornbread stuffing mix and one box of traditional. Mix everything well with a large spoon.

Add the two eggs, and mix very well, distributing the eggs throughout the stuffing. Add the apple cider.
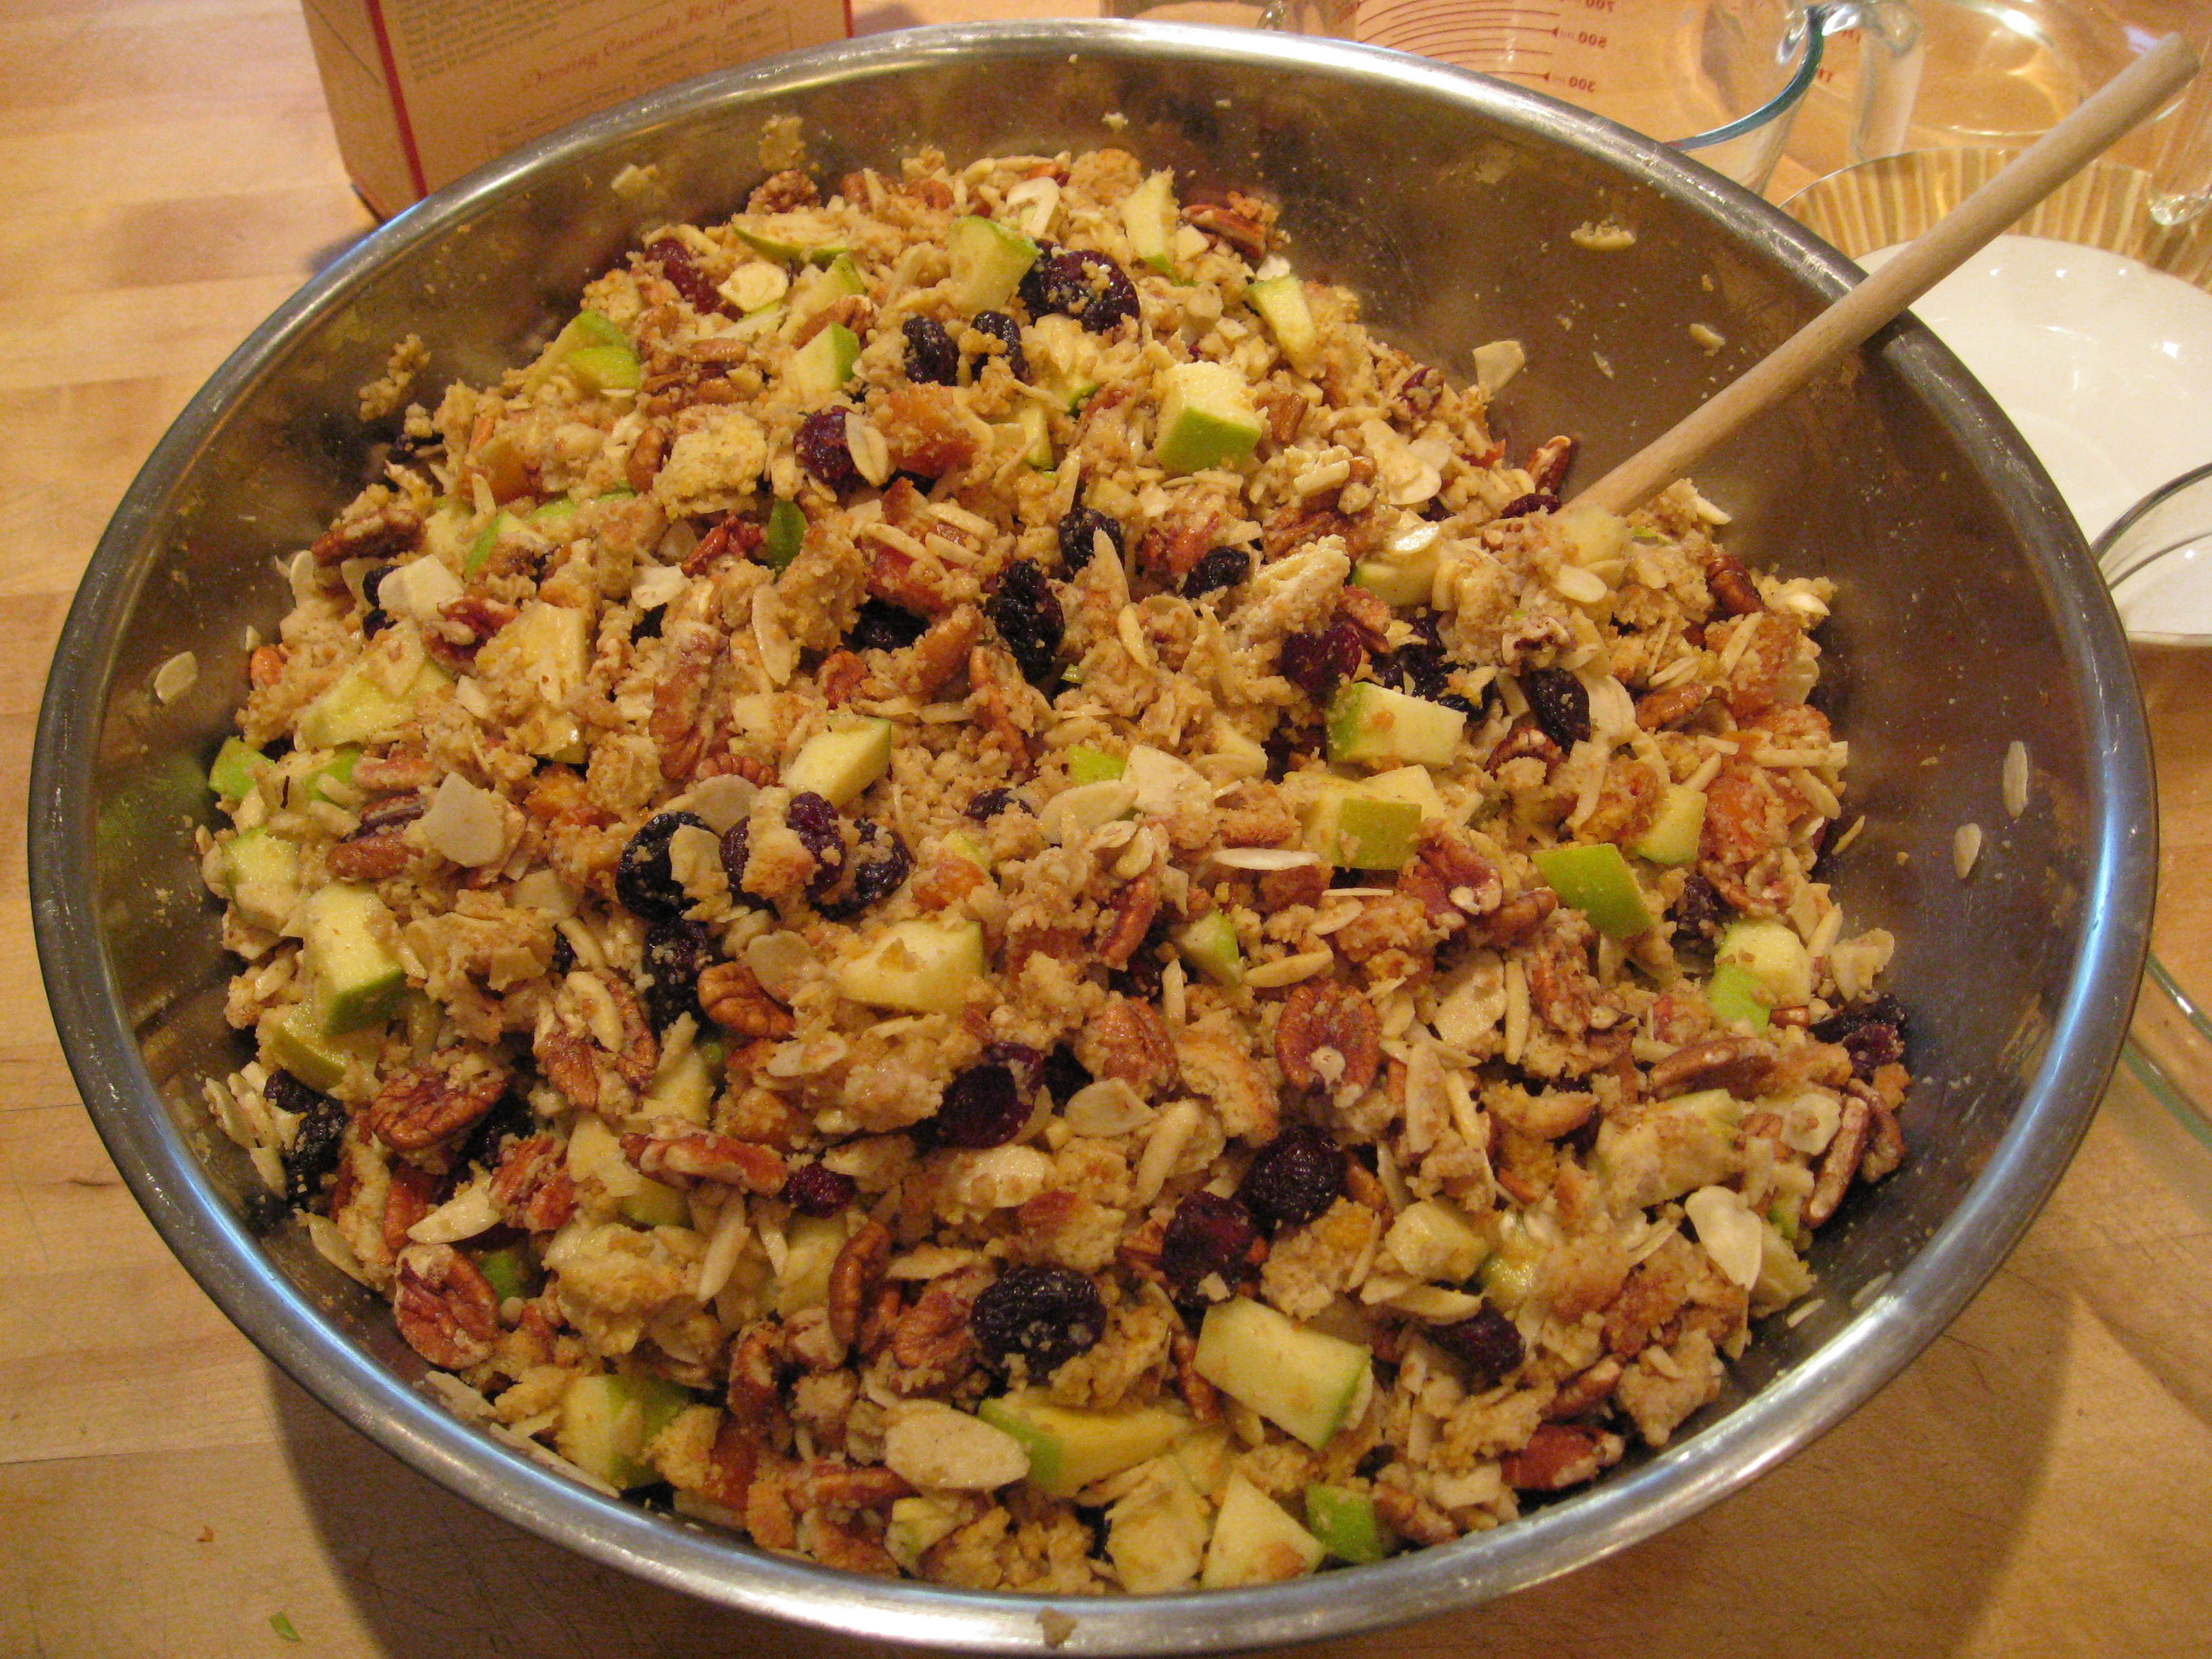
At this point the stuffing is done. You and your assistant can now taste it. You might find you do a lot of tasting, as this is one of the best stuffings you will ever taste, and it needs no cooking to be enjoyed.
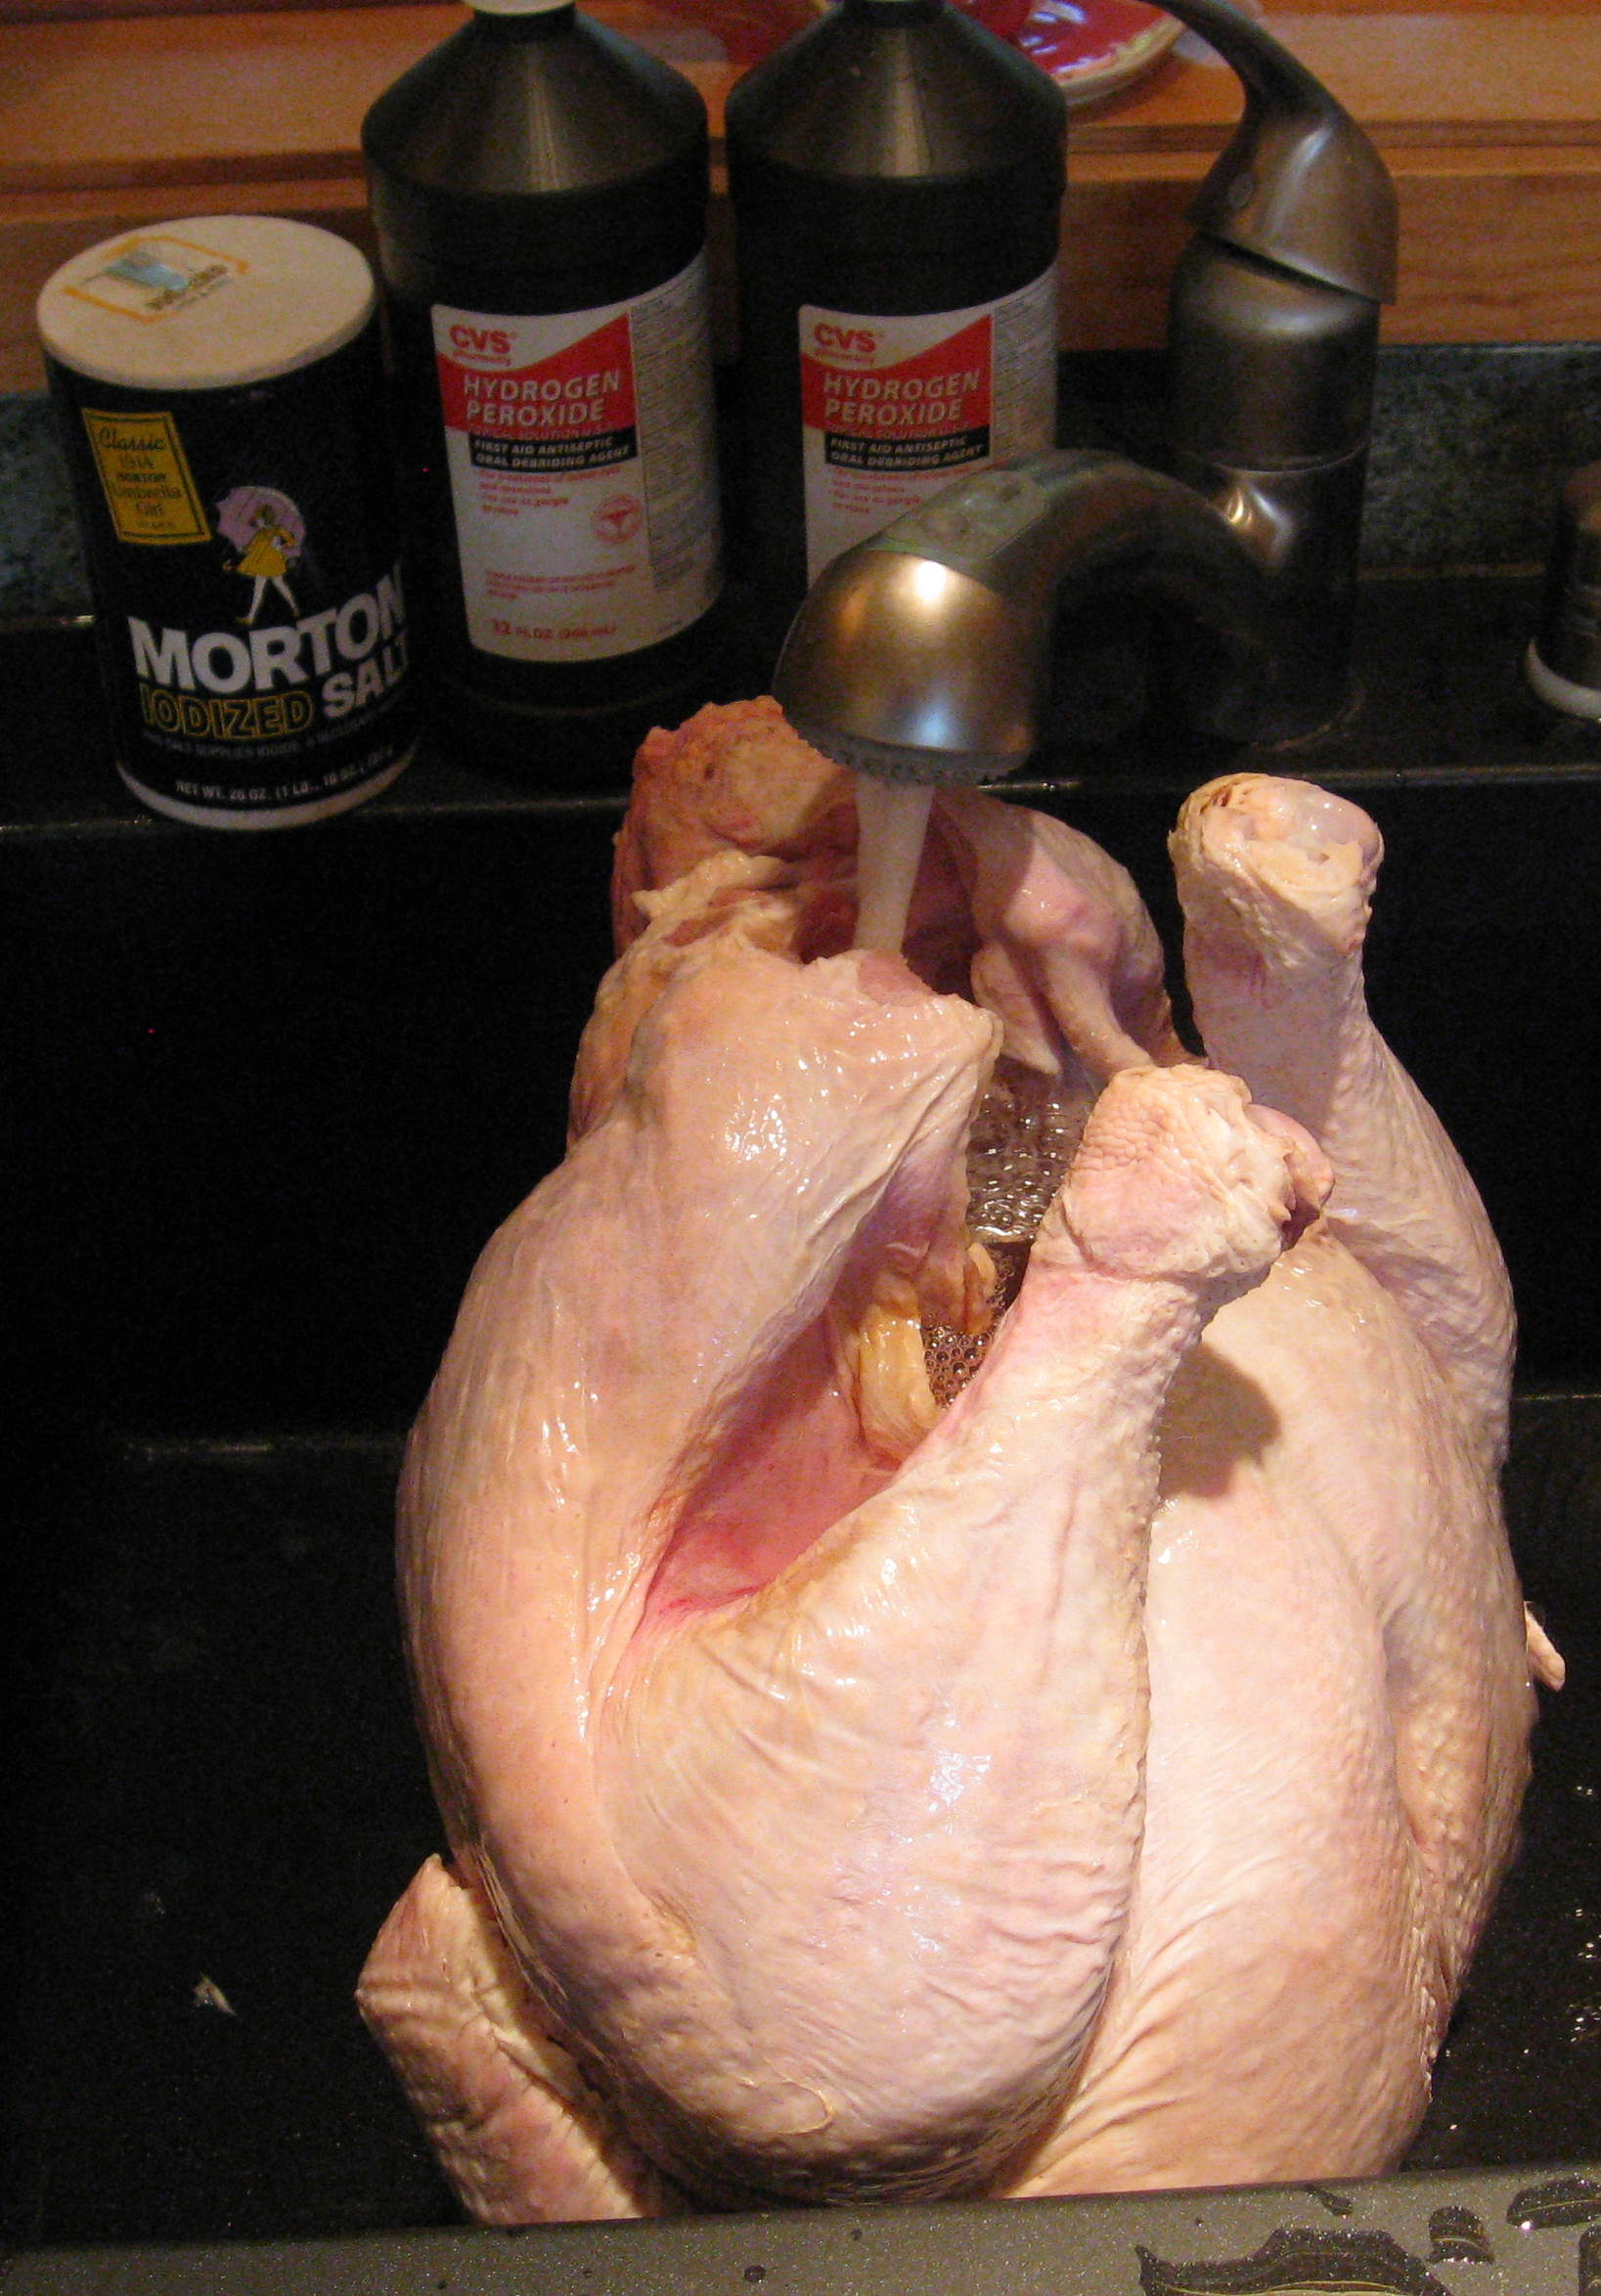
Now we are ready to wash and sterilize the turkey. We rinse it inside and out with hot water. We add a big handful of salt to the inside of the turkey, and use it as a scrubbing aid. We rinse out all of the salt, and then use two quarts of hydrogen peroxide to sterilize the bird inside and out. Let the peroxide sit inside the bird for a few minutes.
Hydrogen peroxide kills any bacteria and molds that might be in or on the turkey. It breaks down into water and oxygen. You will see the oxygen bubbles scrubbing away inside the bird, and on the outside.
We don't rinse the peroxide off of the bird. Almost all of it will drain out of the turkey as we tip it in the sink, but a little will remain inside as we stuff the bird. This will provide extra oxygen, which prevents the growth of botulism bacteria.
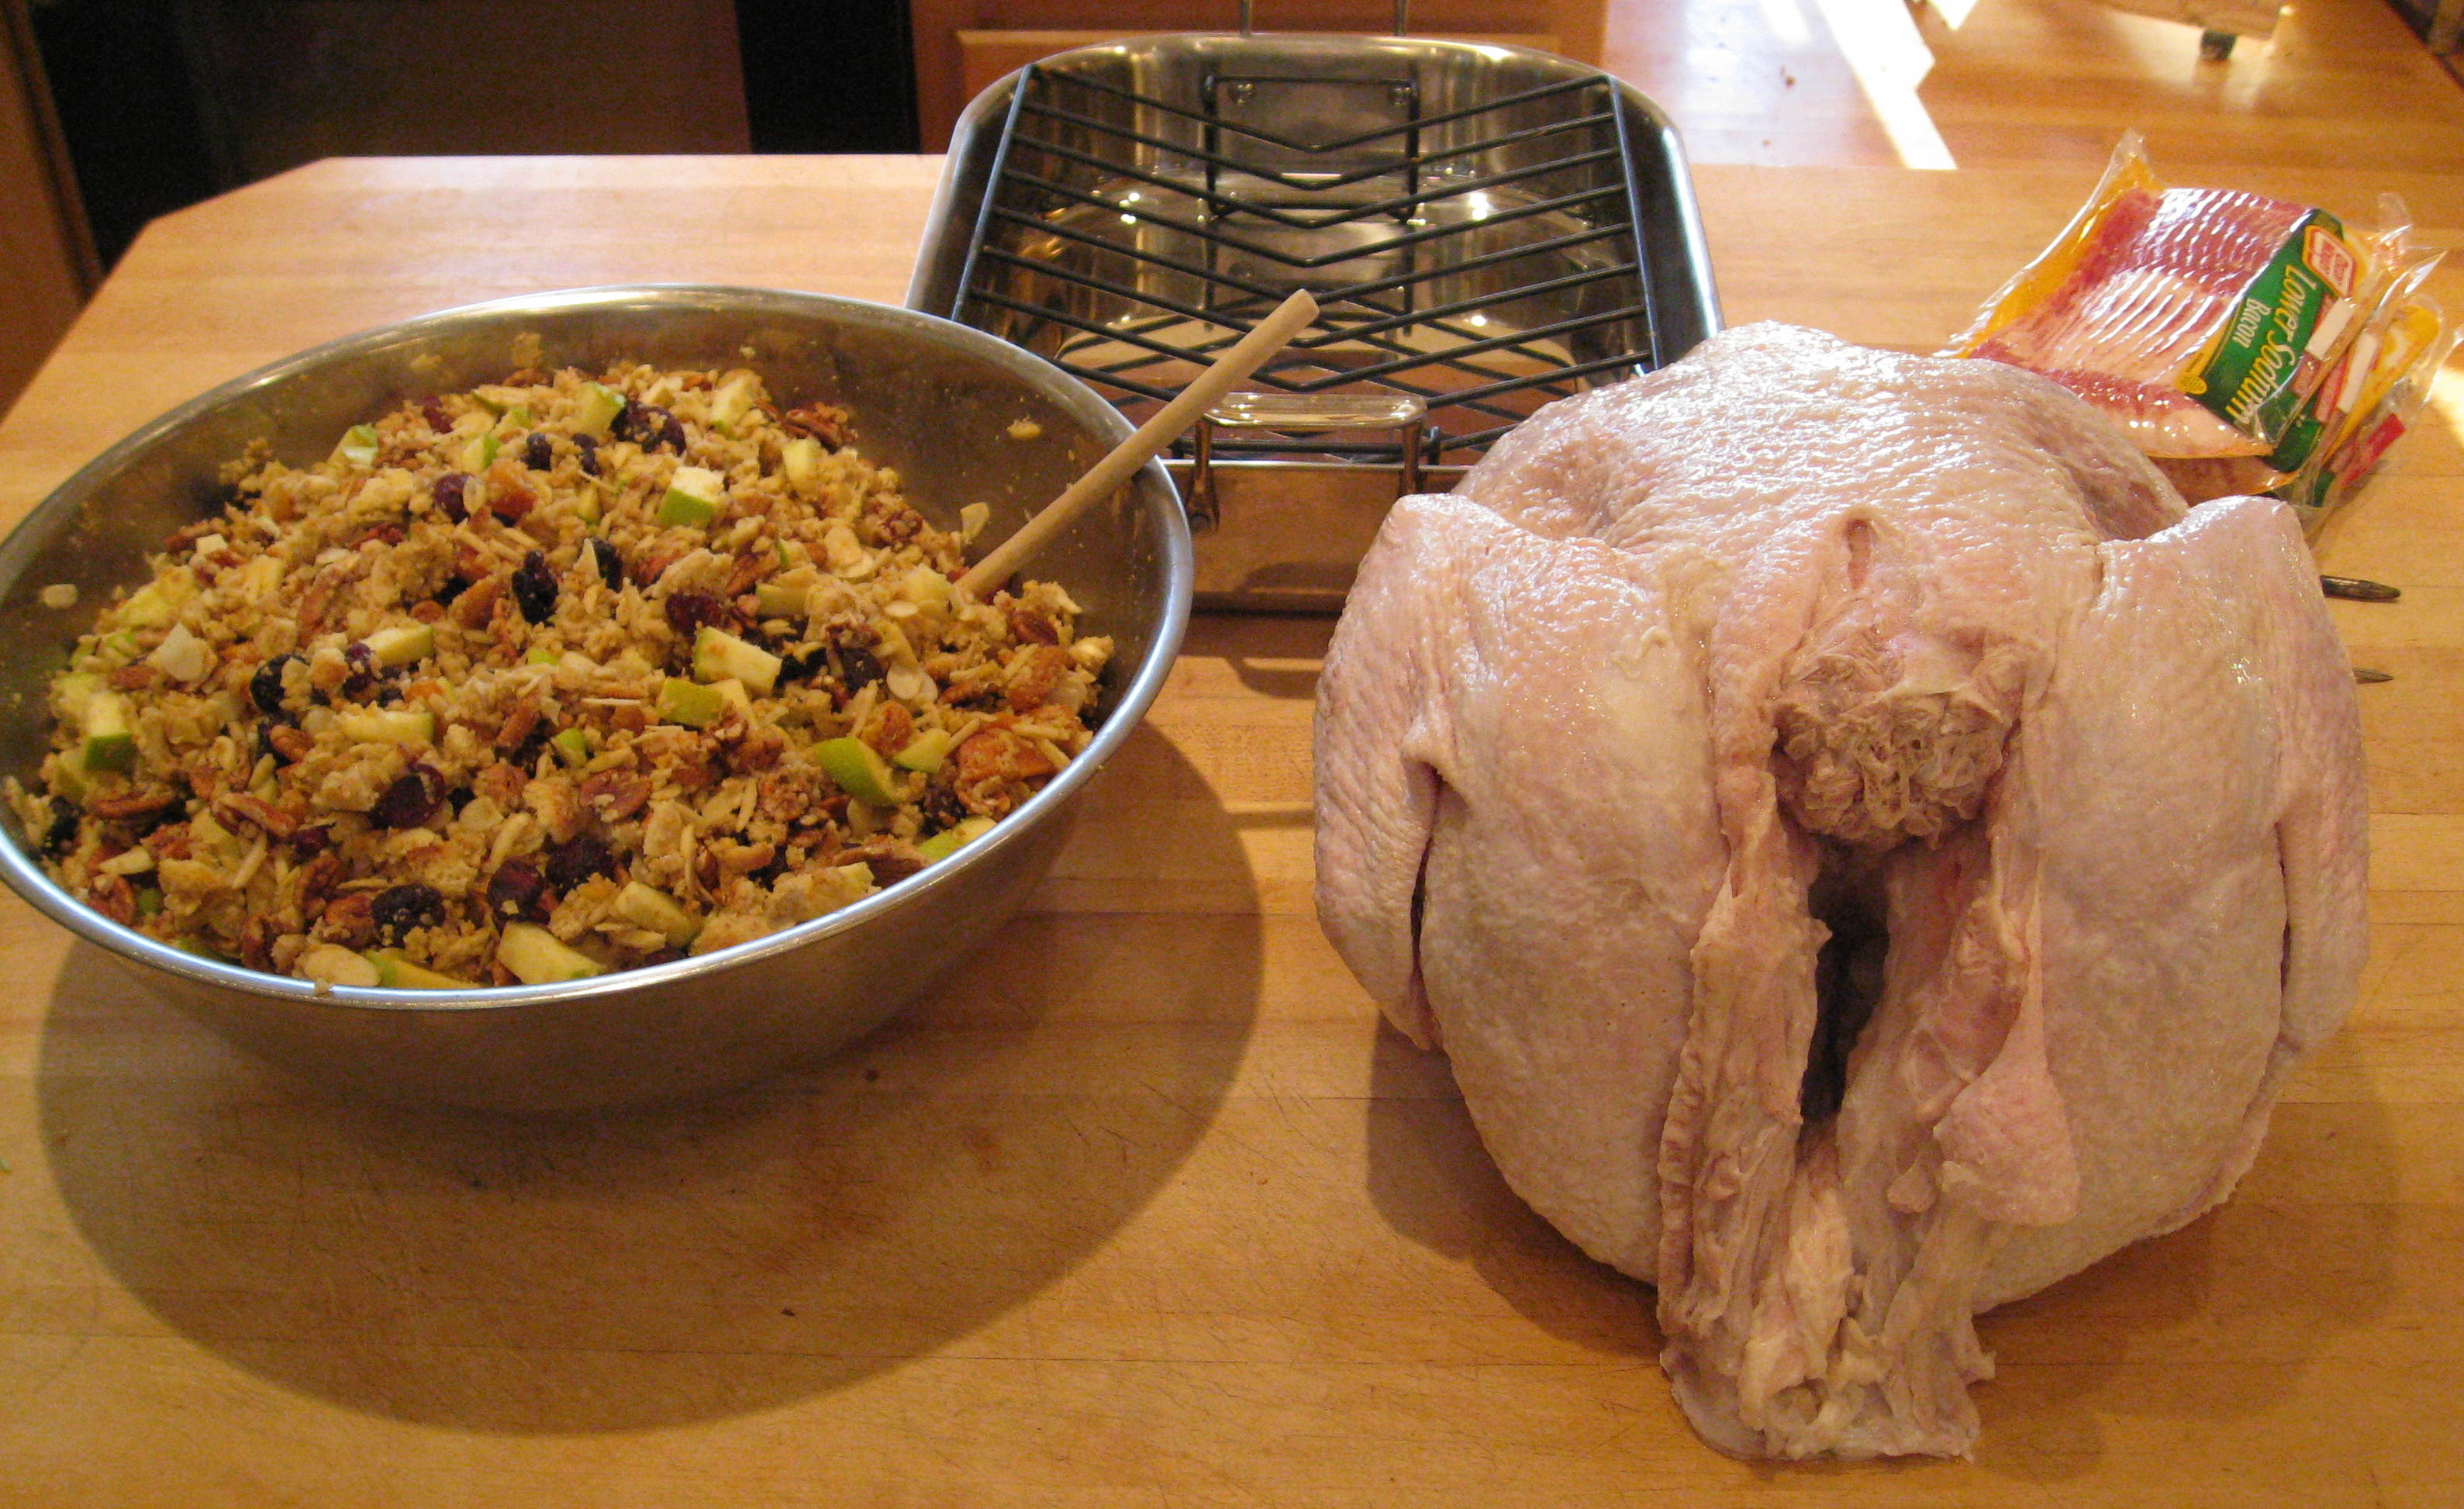
Now we stuff both cavities of the turkey. Go ahead and pack it in tightly — this stuffing can take it.
Use metal or bamboo skewers to close up the openings. Some people lace them shut with string, but I find that the skewers work just fine by themselves.
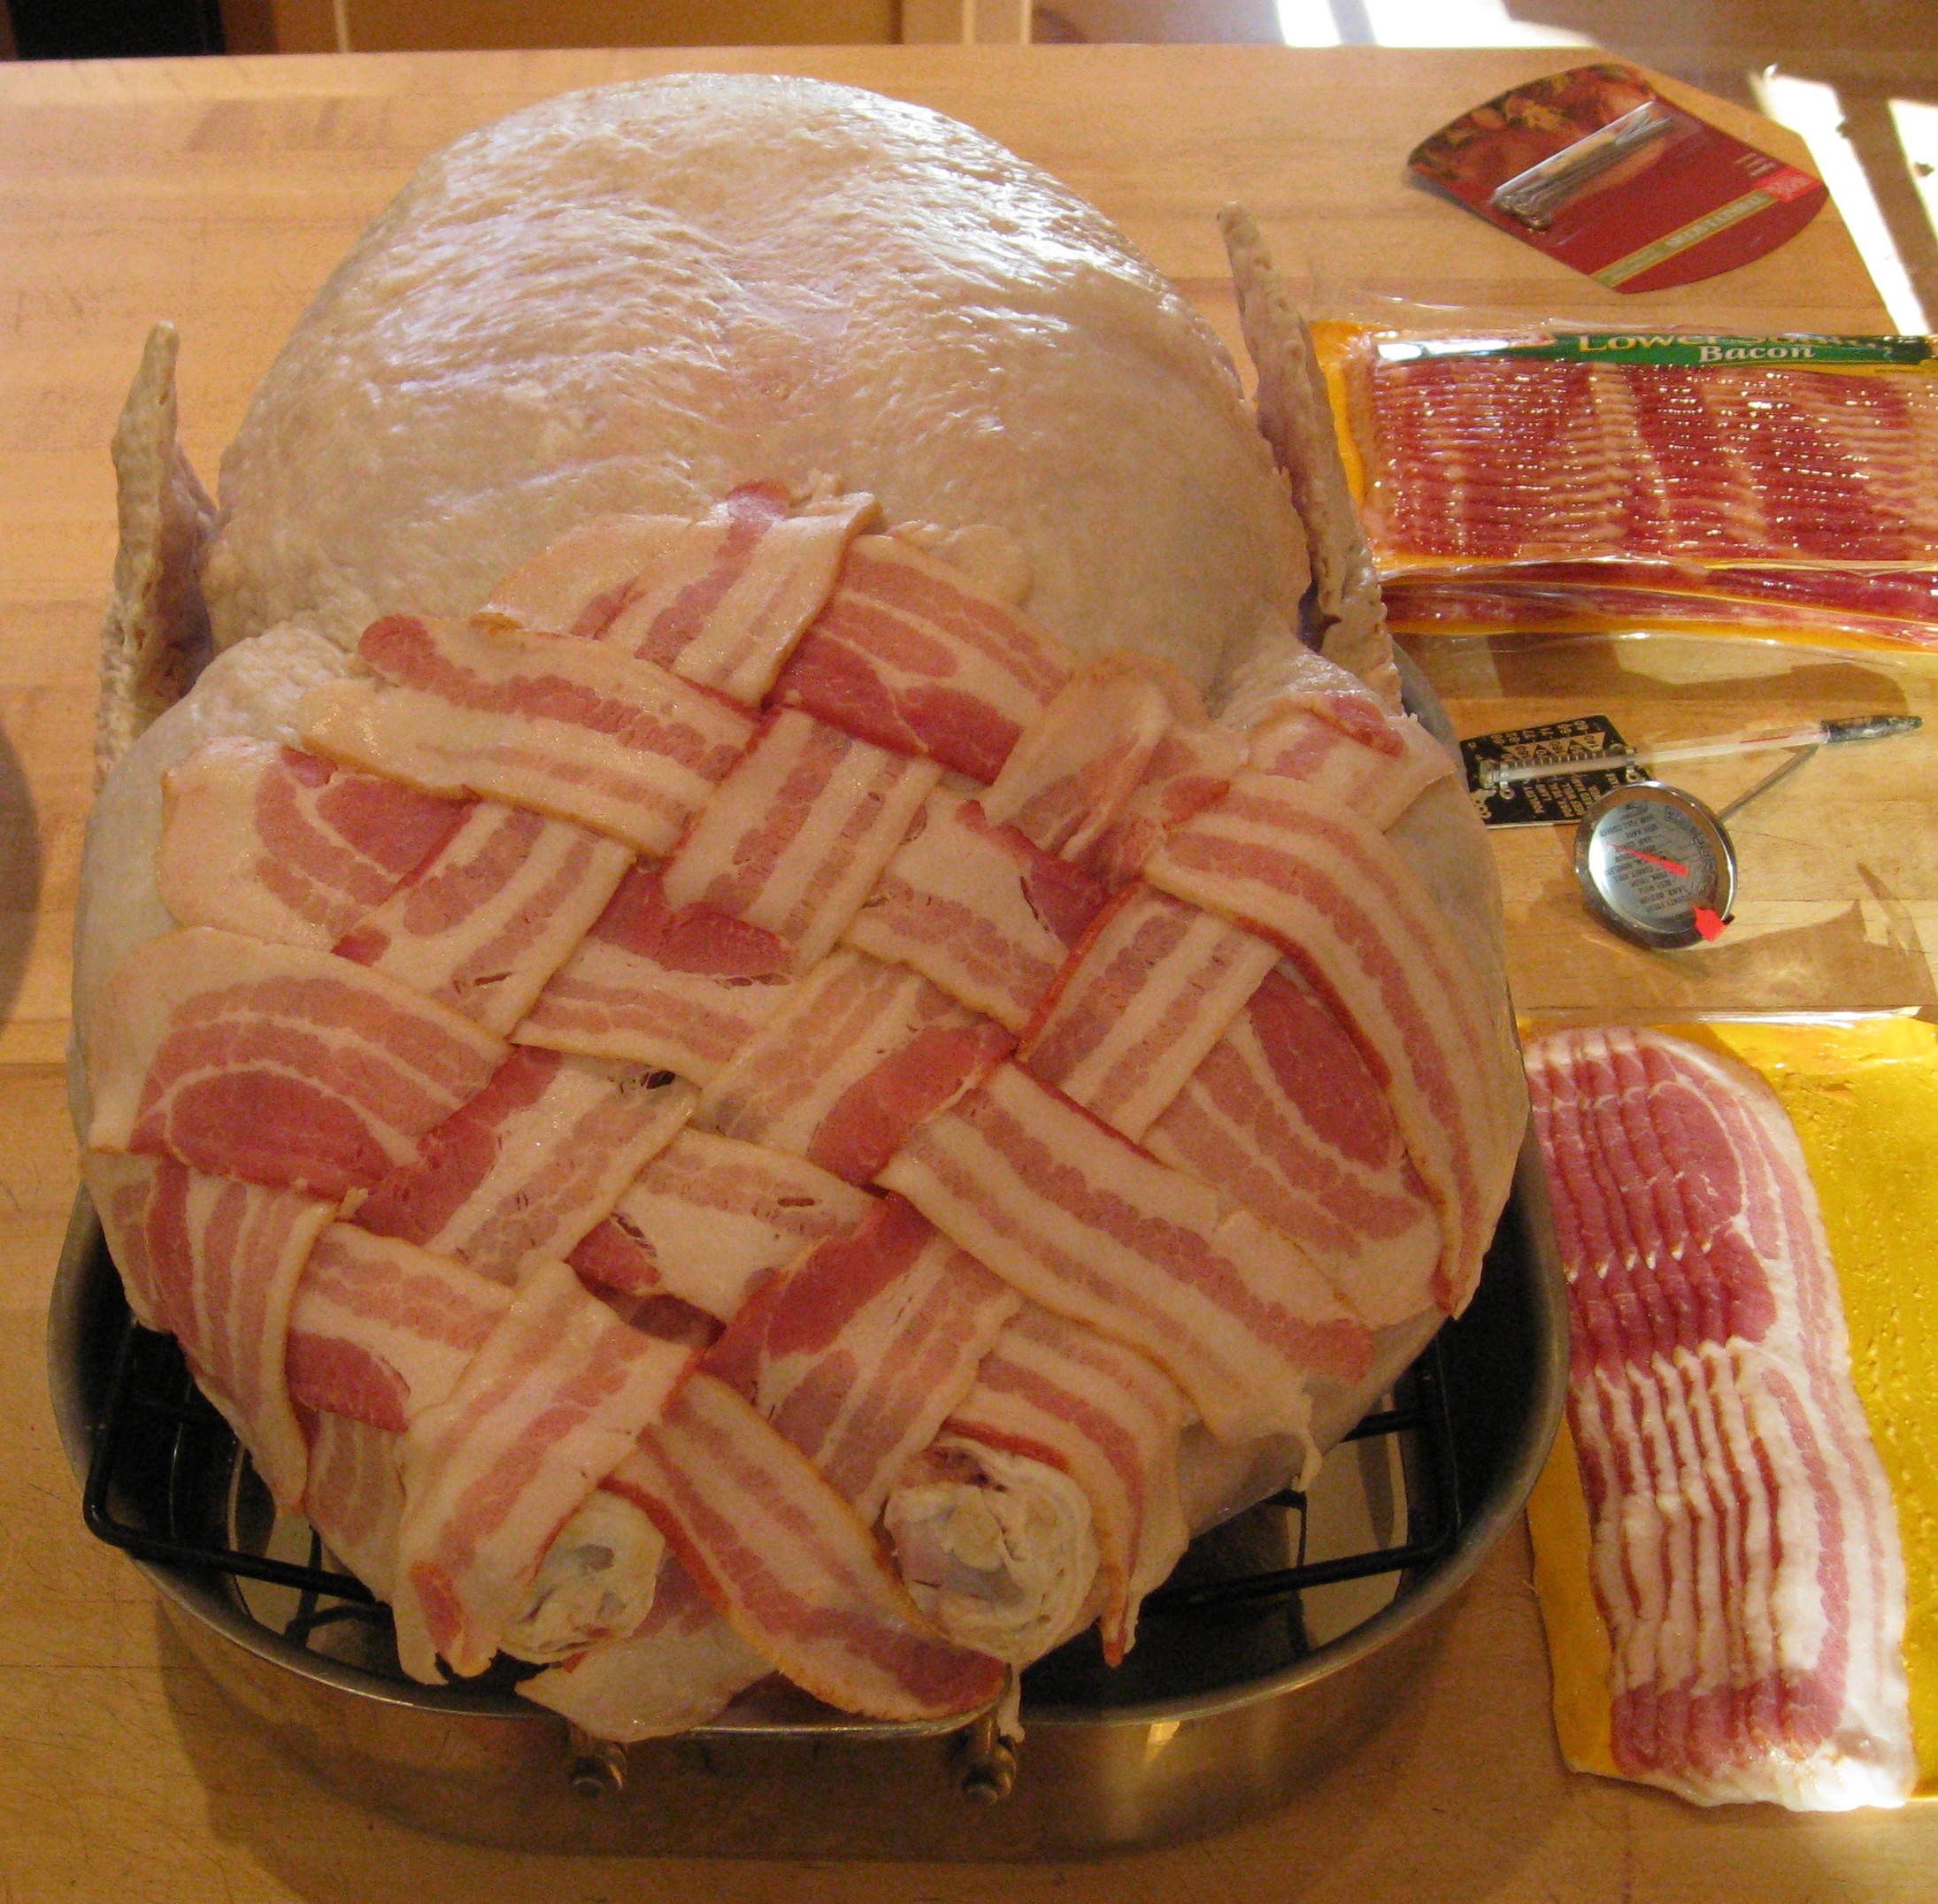
Now we make a basket weave of bacon on top of the turkey. I used to do a simple one layer weave, but each year my guests keep demanding "More bacon!", and I accommodate them. You will see why it is so popular in a minute.
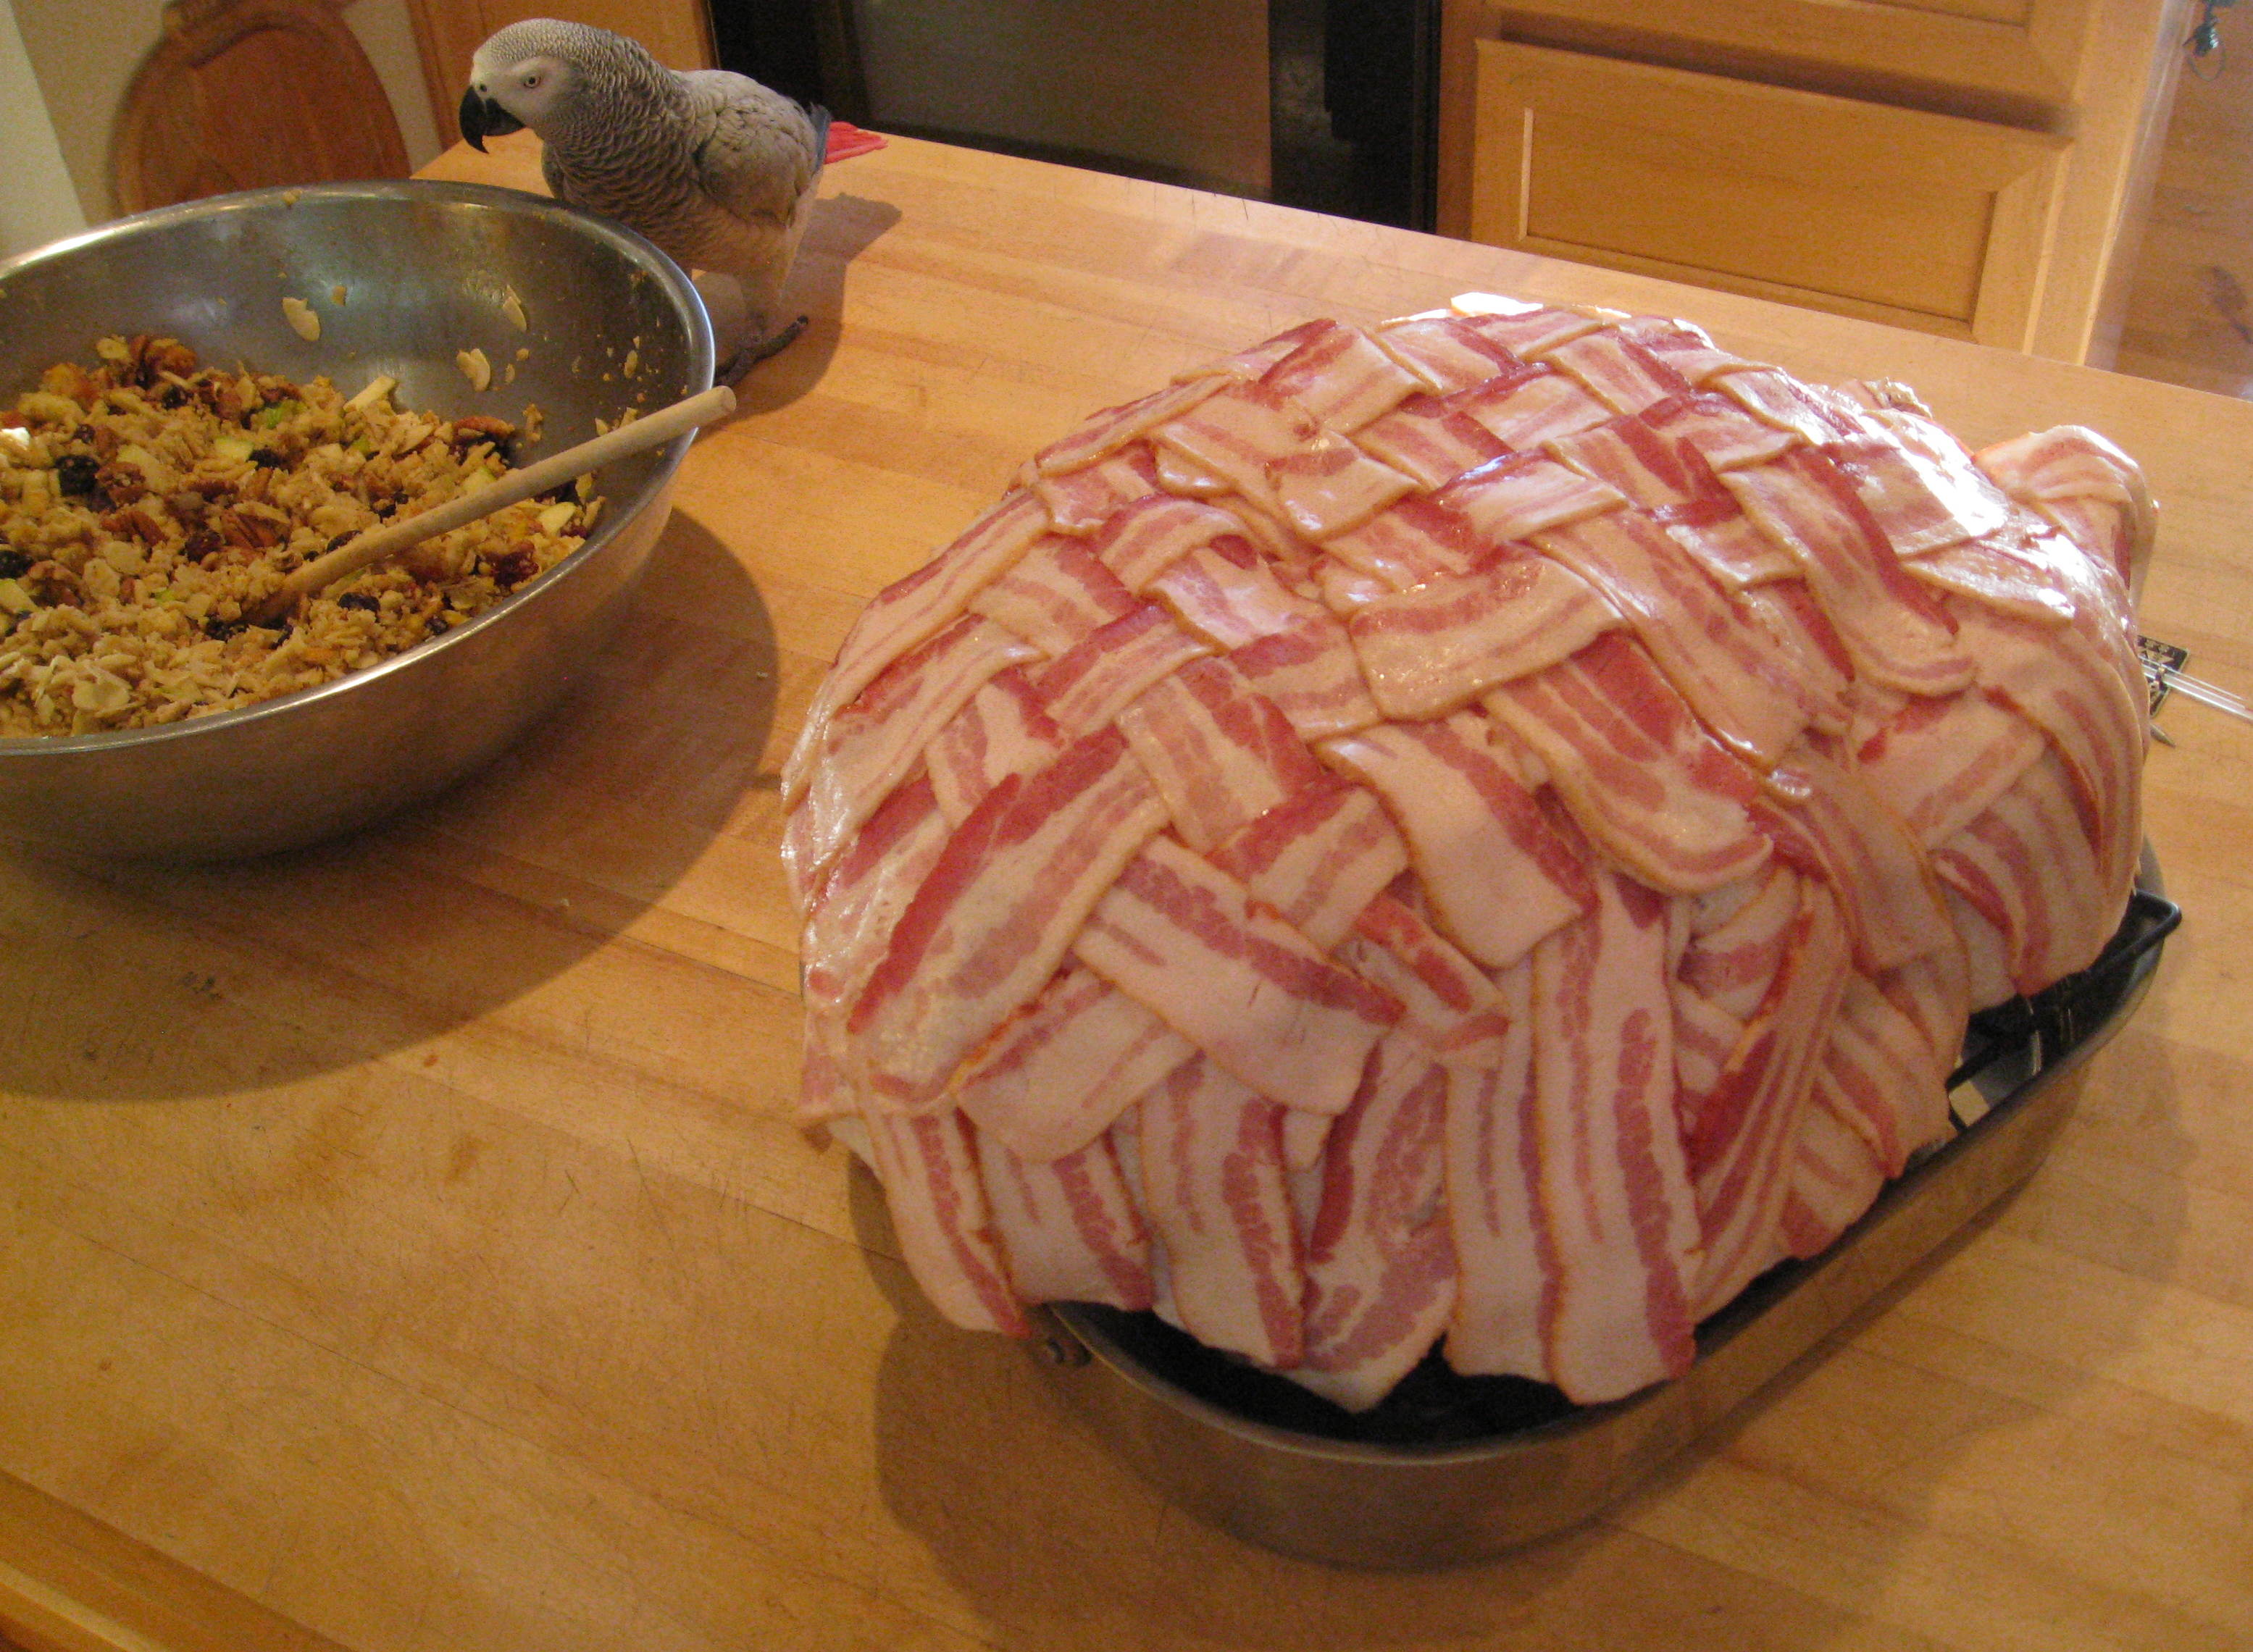
Depending on how large your turkey is, and how hungry you and your assistant are, there will be enough stuffing left over to put into its own casserole dish for your vegetarian friends. If they are very picky, you might have used margarine instead of butter, or found new friends. My assistant is more interested in the stuffing than the bacon-wrapped turkey.
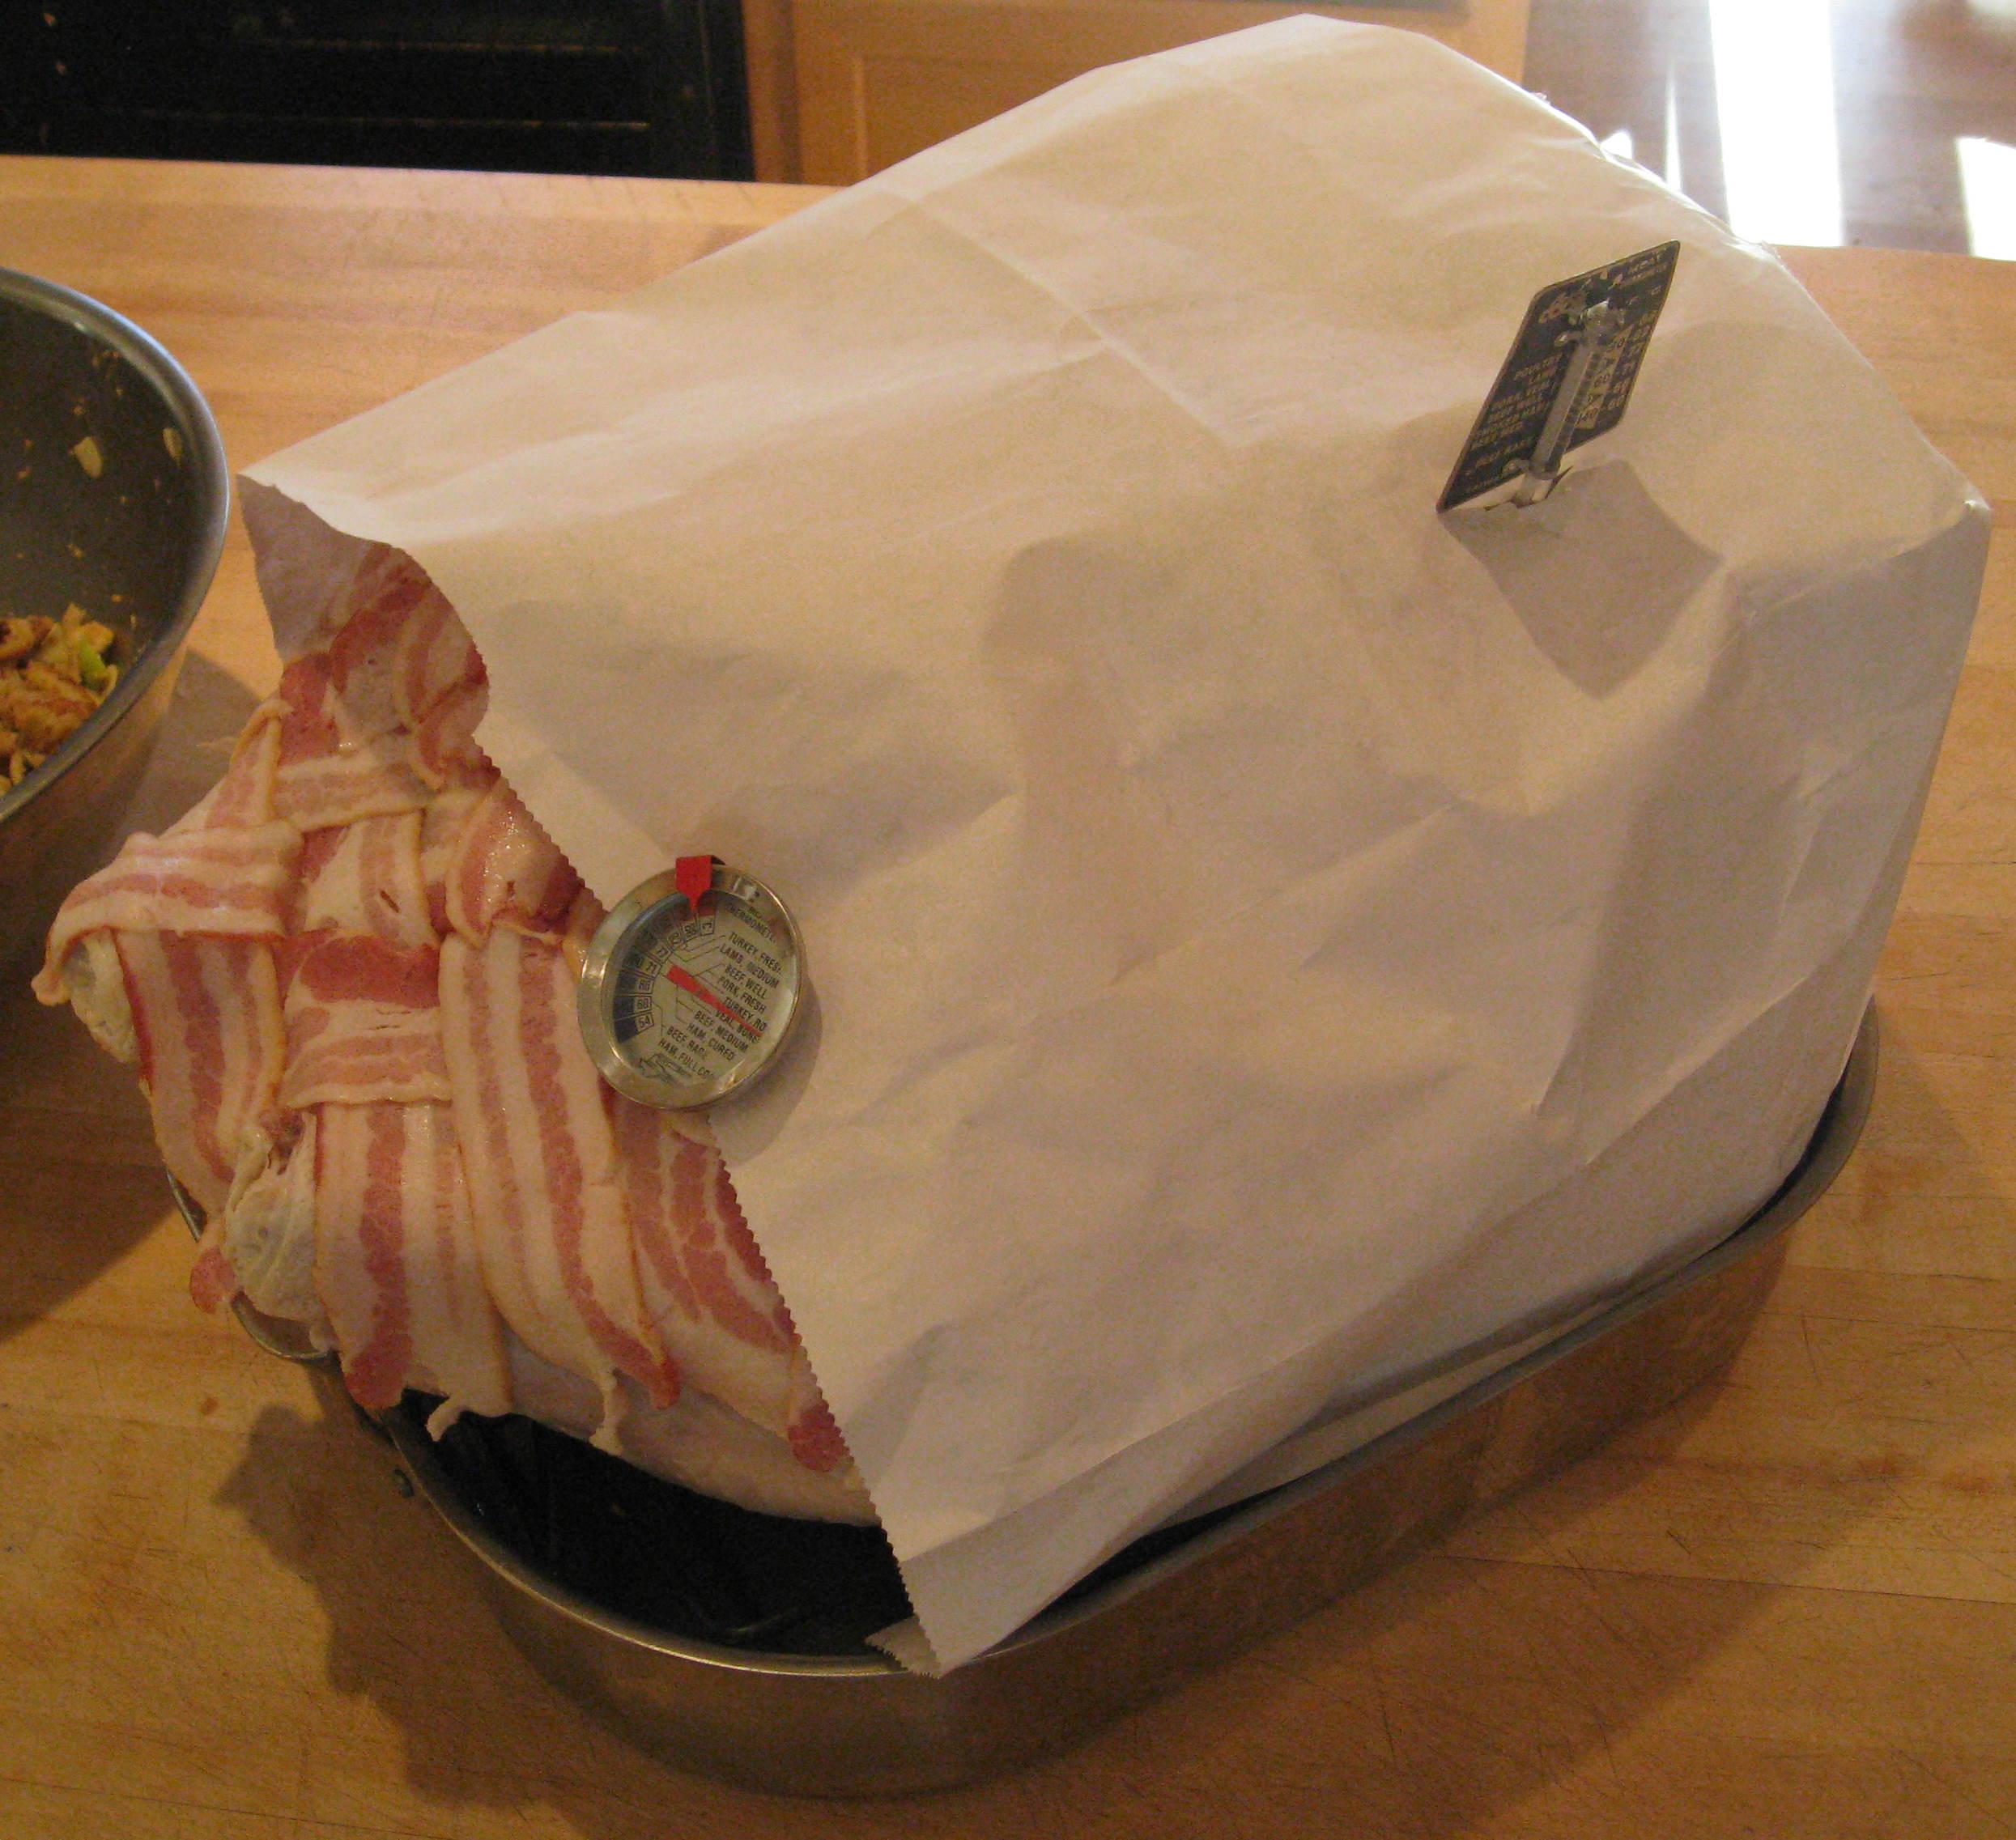
Now we take a clean paper shopping bag, and cut out one side, so we can place it over the turkey. This will prevent splattering in the oven, and keep the steam close to the bird as it cooks.
I like to use two thermometers, one for the breast meat, and one for the dark meat. It doesn't matter, however, as they both end up reading the same when the bird is done. I just like the comfort of redundancy.

A 36 pound turkey will just barely fit into a large oven.
The trick to a moist and tender turkey is to cook it at a temperature below the boiling point of water, but slightly above the temperature you want it to end up when it is done. I use a temperature of 205° Fahrenheit.
We cook the turkey at 350° for the first two hours to further sterilize the outside of the bird before we turn it down to 205°.
In any meat, the tiny bundles of muscle cells are surrounded by a tough layer of connective tissue. To make the meat tender, we raise the temperature until the connective tissue melts into gelatin. But if the temperature gets above the boiling point of water, the steam will burst open these little soft sacks of gelatin, and all of the juices will end up at the bottom of the pan, instead of waiting to ooze out of the meat as it is sliced.
Because we have ensured that the bird is free of harmful bacteria, we can cook it to a lower temperature than is usually called for with poultry. This will prevent the breast meat from becoming dry. This is the way I like my turkey, cooked to about 150° Fahrenheit.
However, this results in the thigh meat looking red, especially around the joints, and this terrifies some of my guests. For them, I allow the turkey to cook to 160° or even 170°, which makes the breast meat a little dry to my taste, but the dark meat is still moist and delicious. Being a dark meat fan, I find this compromise perfectly acceptable.
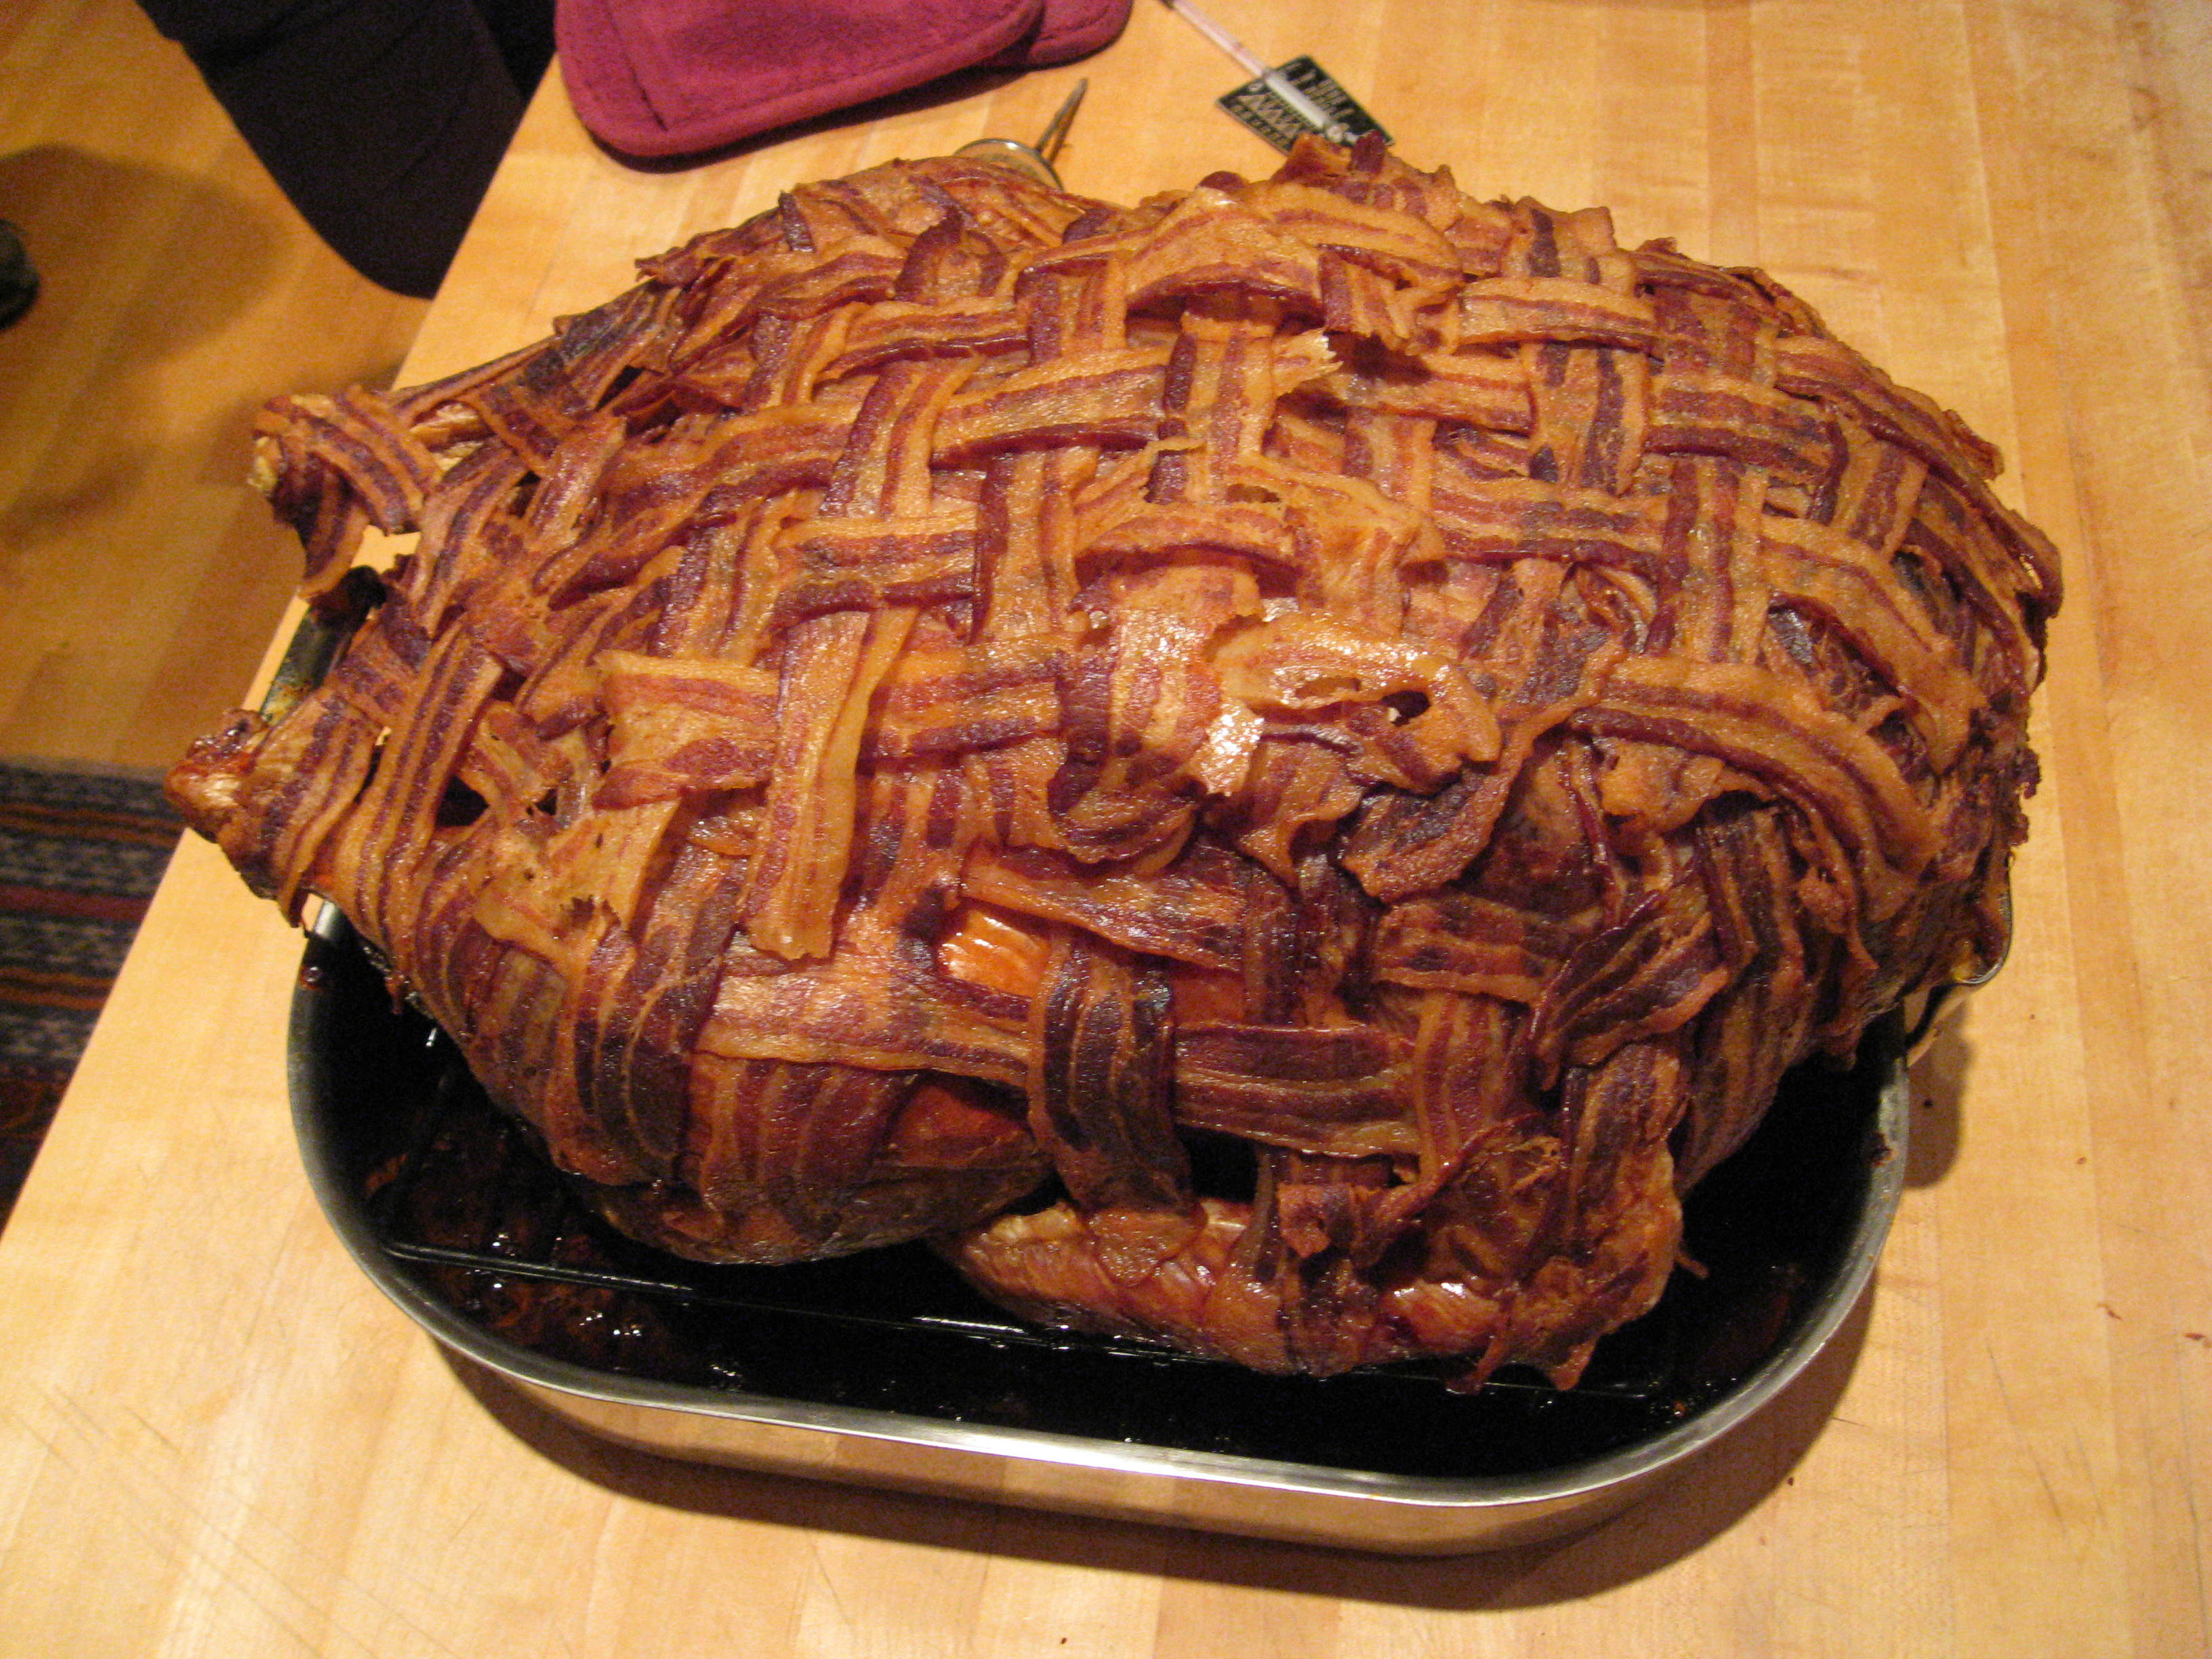
The turkey should be done a couple of hours before you start dinner. This allows you to use the oven for all of the other trimmings you want to have with the meal. More importantly, it allows time for the turkey to cool, and the little gelatin packets to gel, so the bird carves without falling apart.

For my guests, it also gives them time to pick off all of the bacon and eat it. This is not just an important ritual for this group, but it is also a necessary step before carving. All of that hard, brittle bacon shell has to be removed so the knife can find something to slice into.