How to make Cherry Dream Cheese
How to make Cherry Dream Cheese
Making your own cheese is fun, but since a gallon of milk costs almost as much as a pound of cheap cheese, and almost half as much as a pound of good cheese, the cheese you make has to be pretty good to justify the expense.
This cheese fits the bill perfectly.
Cheese excites the salt sensors on the tongue, as well as the savory or umami sensors that respond to glutamate, indicating a rich protein source.
To round out the flavor palate, we want to excite the sweet sensors and the sour sensors on the tongue as well. (I'll let someone else devise a good tasting recipe that also excites the two bitter sensors -- I'd just as soon avoid those, myself.)
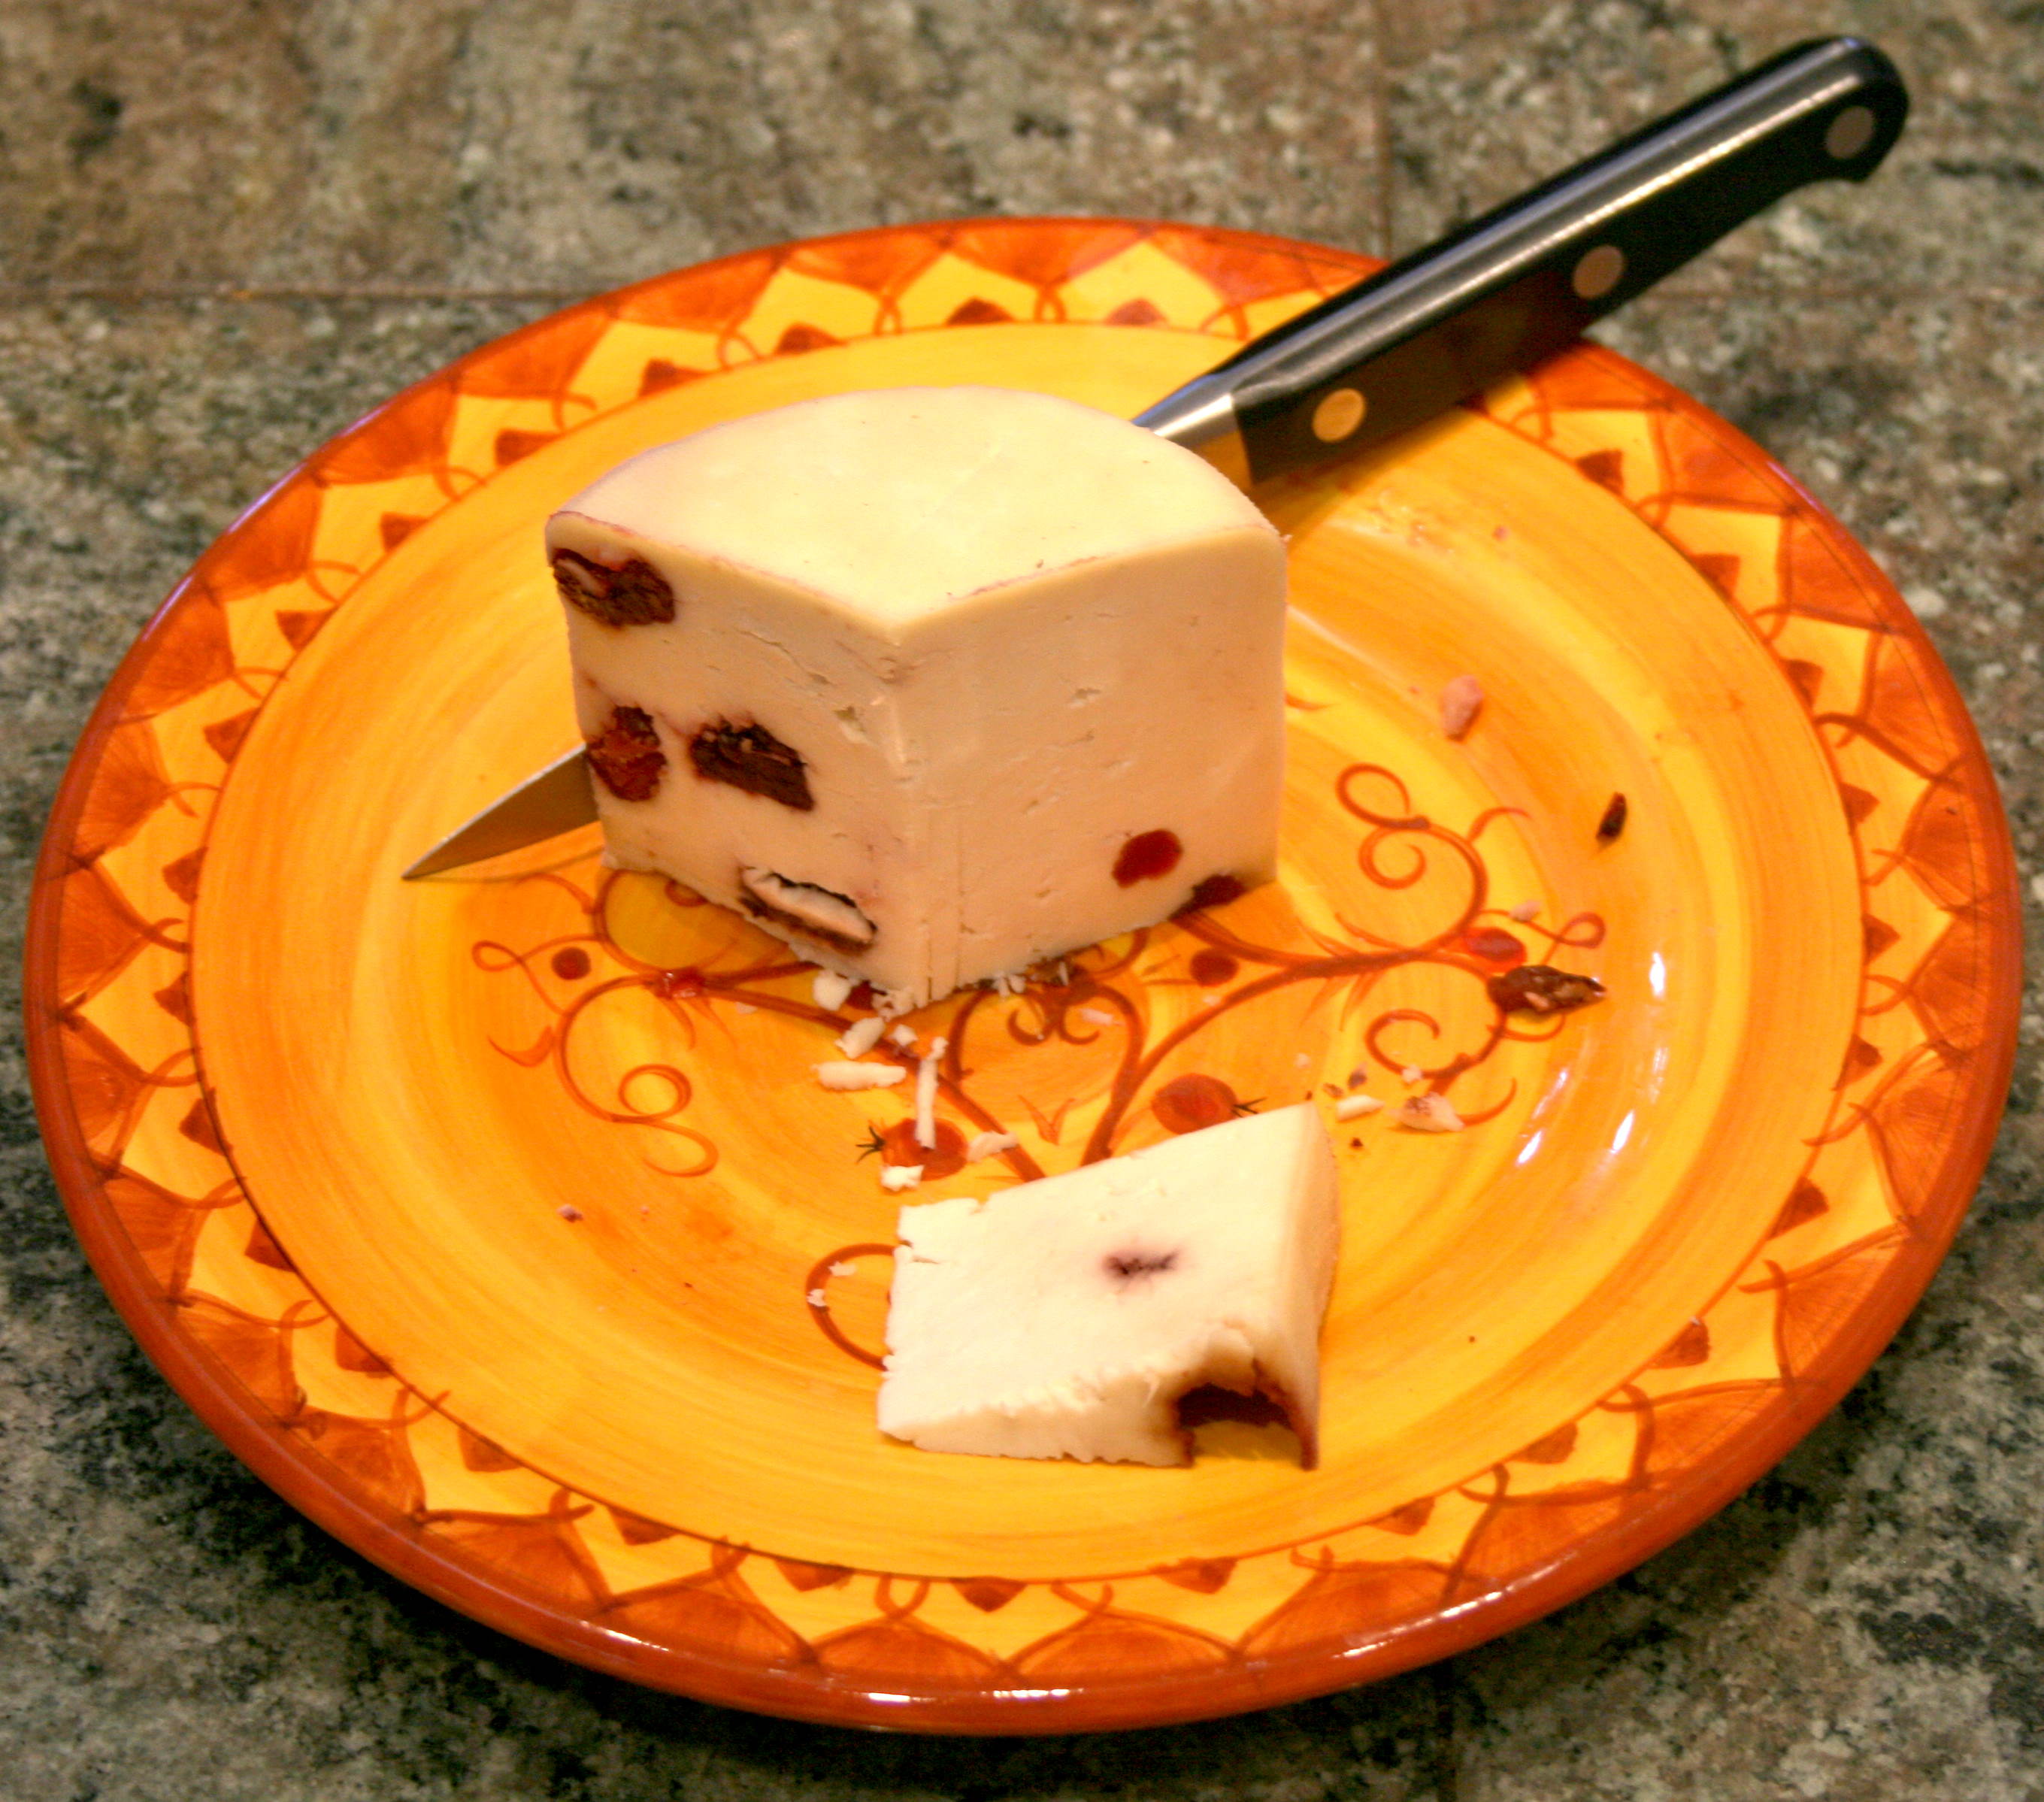
Dried Bing cherries are just the ticket. Not so sweet as to overpower the cheese, not so tart as to pucker faces, these colorful little nuggets nestle into the cheese as if they belonged there. And they do.
For about a pound of finished cheese:
Ingredients:
- One gallon of whole milk
- One half cup of unflavored yogurt (or vanilla flavored)
- One quarter tablet of rennet
- Two teaspoons of salt
- Half a cup of dried Bing cherries
- One tablespoon of sugar
- One red crayon
- One quarter pound of paraffin wax
Tools and utensils:
- One six quart pot with lid
- Spoon to stir the pot
- Long knife to cut the curds
- Large strainer
- Four square feet (or more if you like) of cheesecloth (I prefer the fine weave type)
- One foot of 4 inch diameter ABS pipe, cleaned well
- Disk of wood or hard plastic to just fit inside pipe (I cut the plastic lid from a large container of chocolate coated almonds)
- Fifty pounds of something (concrete blocks, bricks, old gym weights, etc.)
We start out by sterilizing the pot. Put a half an inch of water in the pot, and boil it for 10 minutes with the lid on. Then dump the water into the sink, being careful not to scald yourself with the hot steam.
Next, pour the gallon of milk into the pot, and warm it to about 80° Fahrenheit (27° Celsius). You can do this on the stove if you have a thermometer, otherwise just let it sit until it reaches room temperature, which will be warm enough (we can just let the bacteria work on the milk a little longer).
Stir in the yogurt. Cultured buttermilk will also work, and the amount is not critical, anything from a few tablespoons to a cup will do. What we are doing in this step is adding Lactobacillus acidophilus bacteria to the milk. These bacteria will grow and reproduce, and make the milk acidic enough for the rennet to do its job. A small amount will take a little longer than a larger amount, but we are going to let this sit for 24 hours anyway, so either amount will work fine.
Put the pot (with the cover on!) in a warm place for 24 to 36 hours. We aren't making yogurt here, so the milk will still be liquid when the time is up, but it will be just the tiniest bit tart, like a weak buttermilk.
Dissolve the one quarter tablet of rennet in a few tablespoons of water. You can use a half tablet or a whole tablet if you like. Rennet is an enzyme, so it acts like a catalyst, changing the milk but not getting used up in the process. Using more makes the process go a little faster, but we are not in a hurry here, take your time.
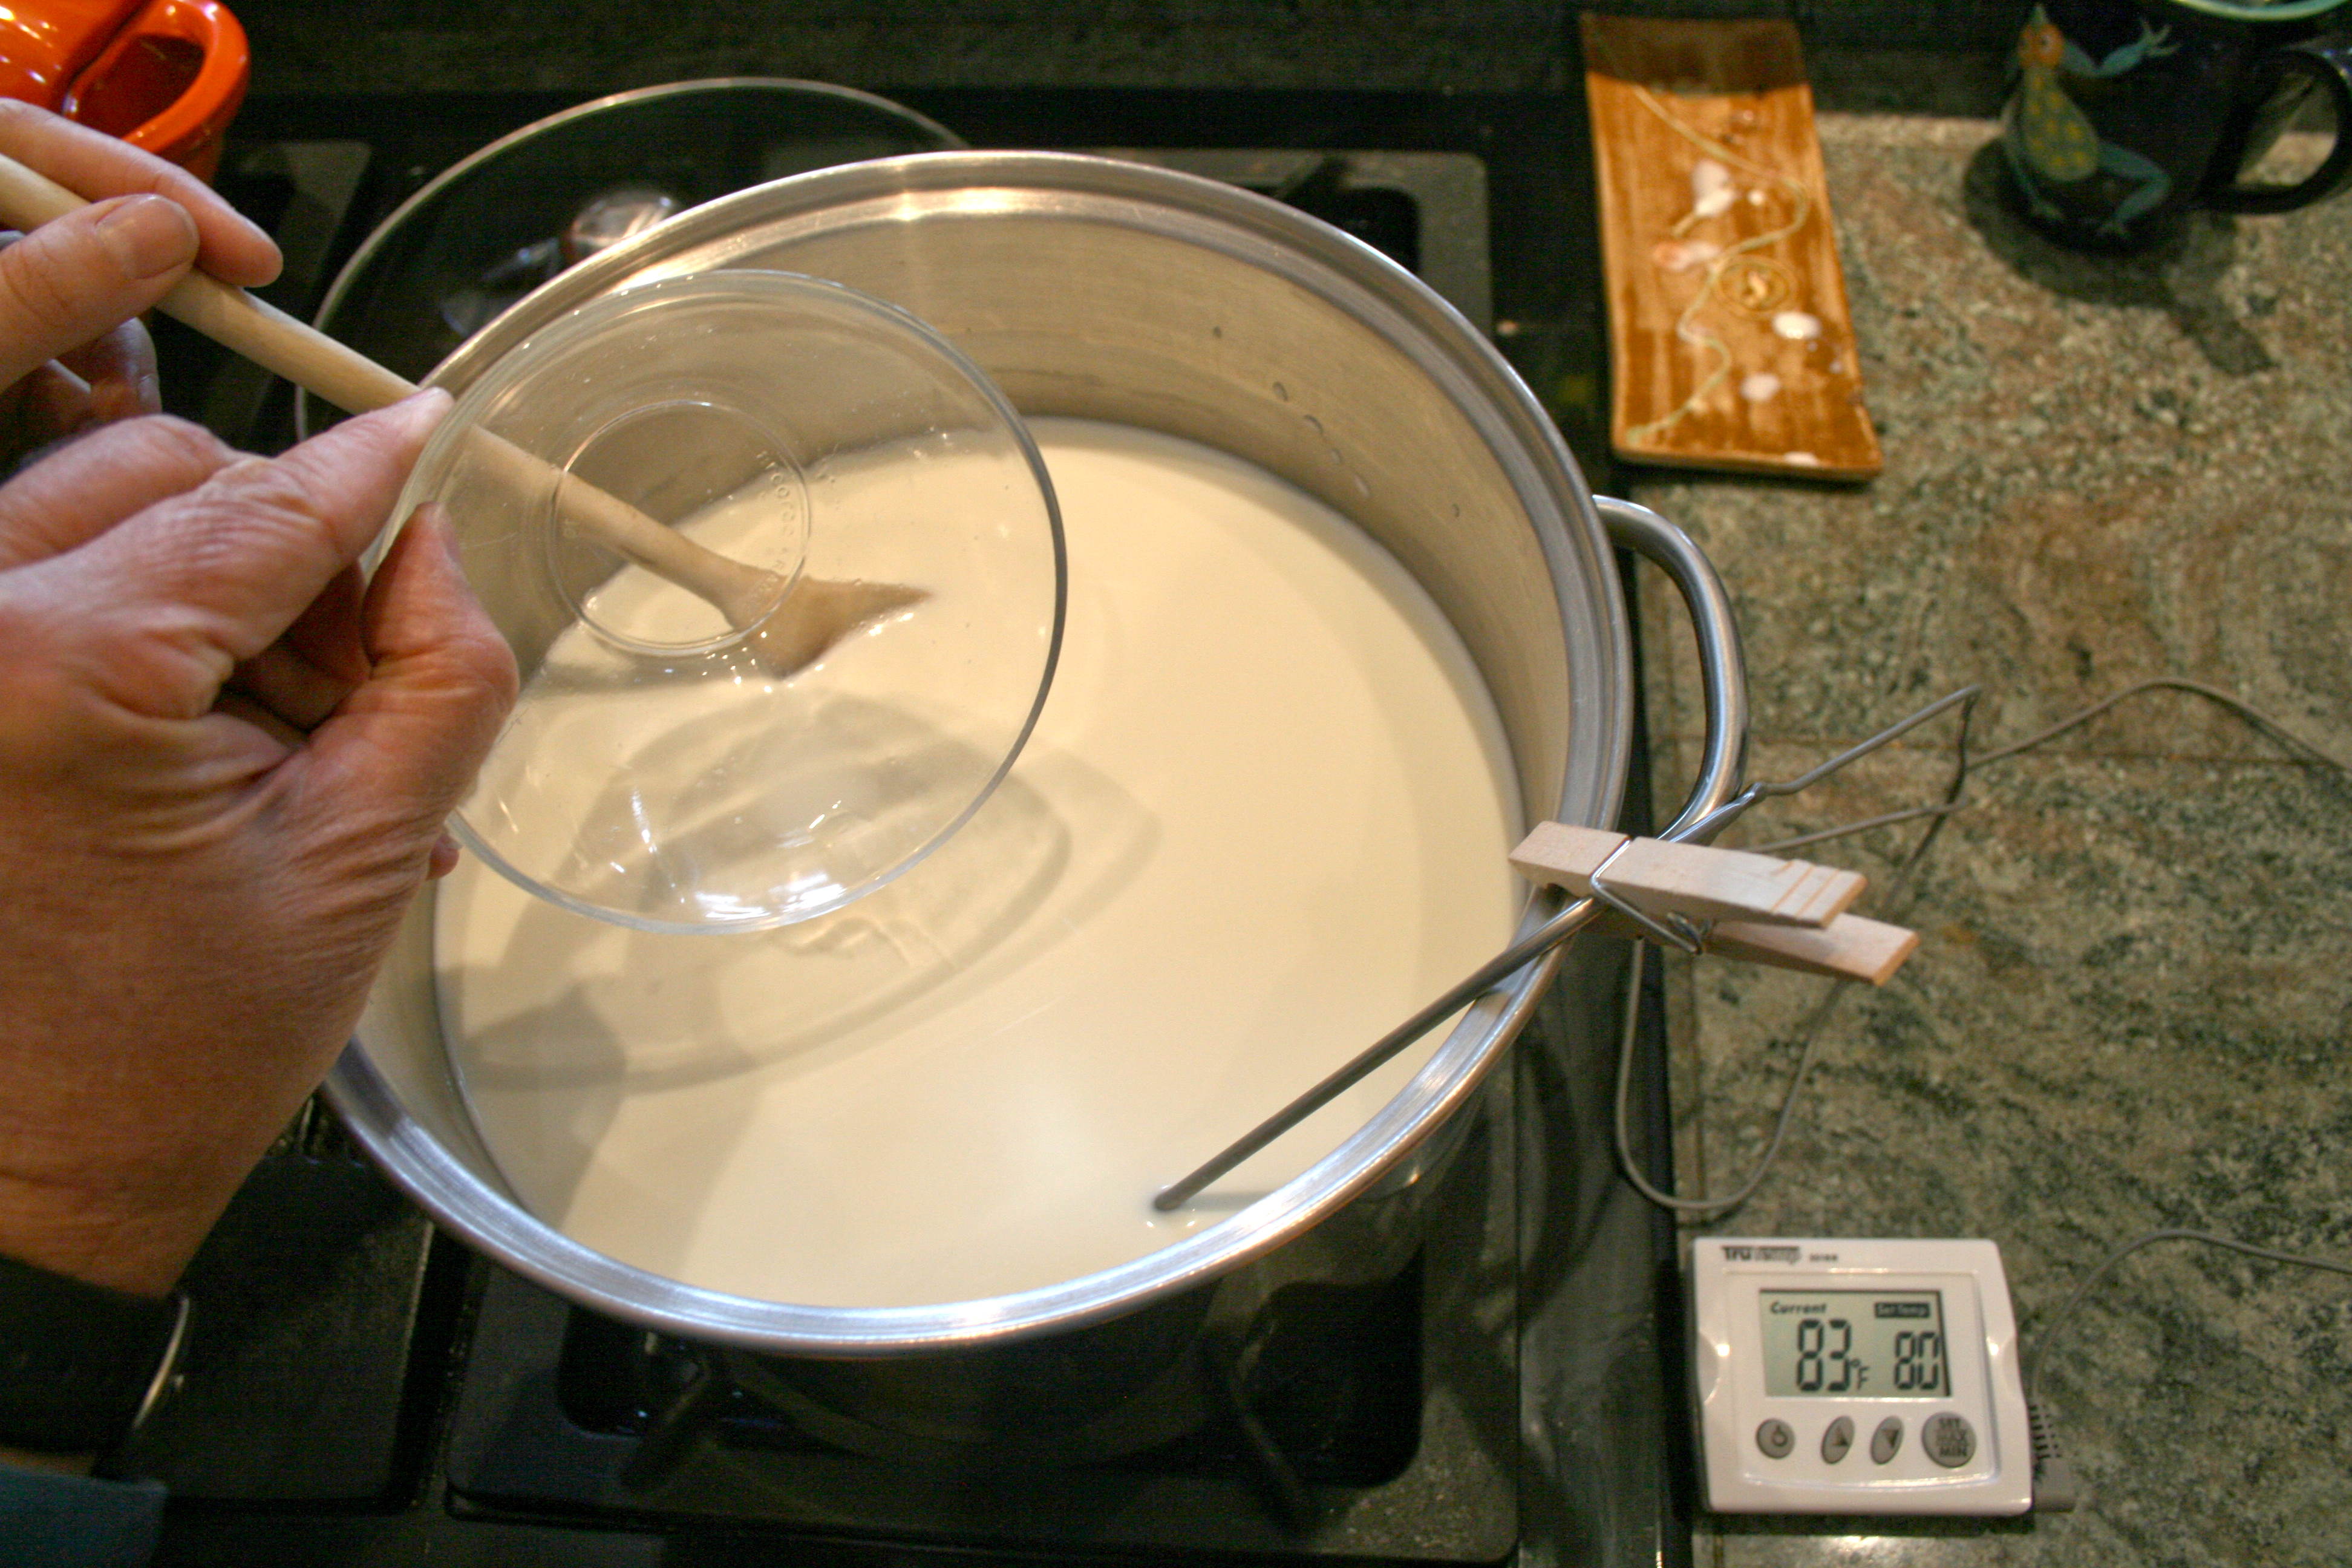
On the stove, heat the milk to between 80° and 86° Fahrenheit (call it 30° Celsius). Watch the thermometer carefully while you do this, and stir well, since it will only take a minute, and we don't want to overheat it. If you don't think you can do this, then don't heat the milk at all, just use twice as much rennet (half a tablet).
Stir the rennet into the milk.
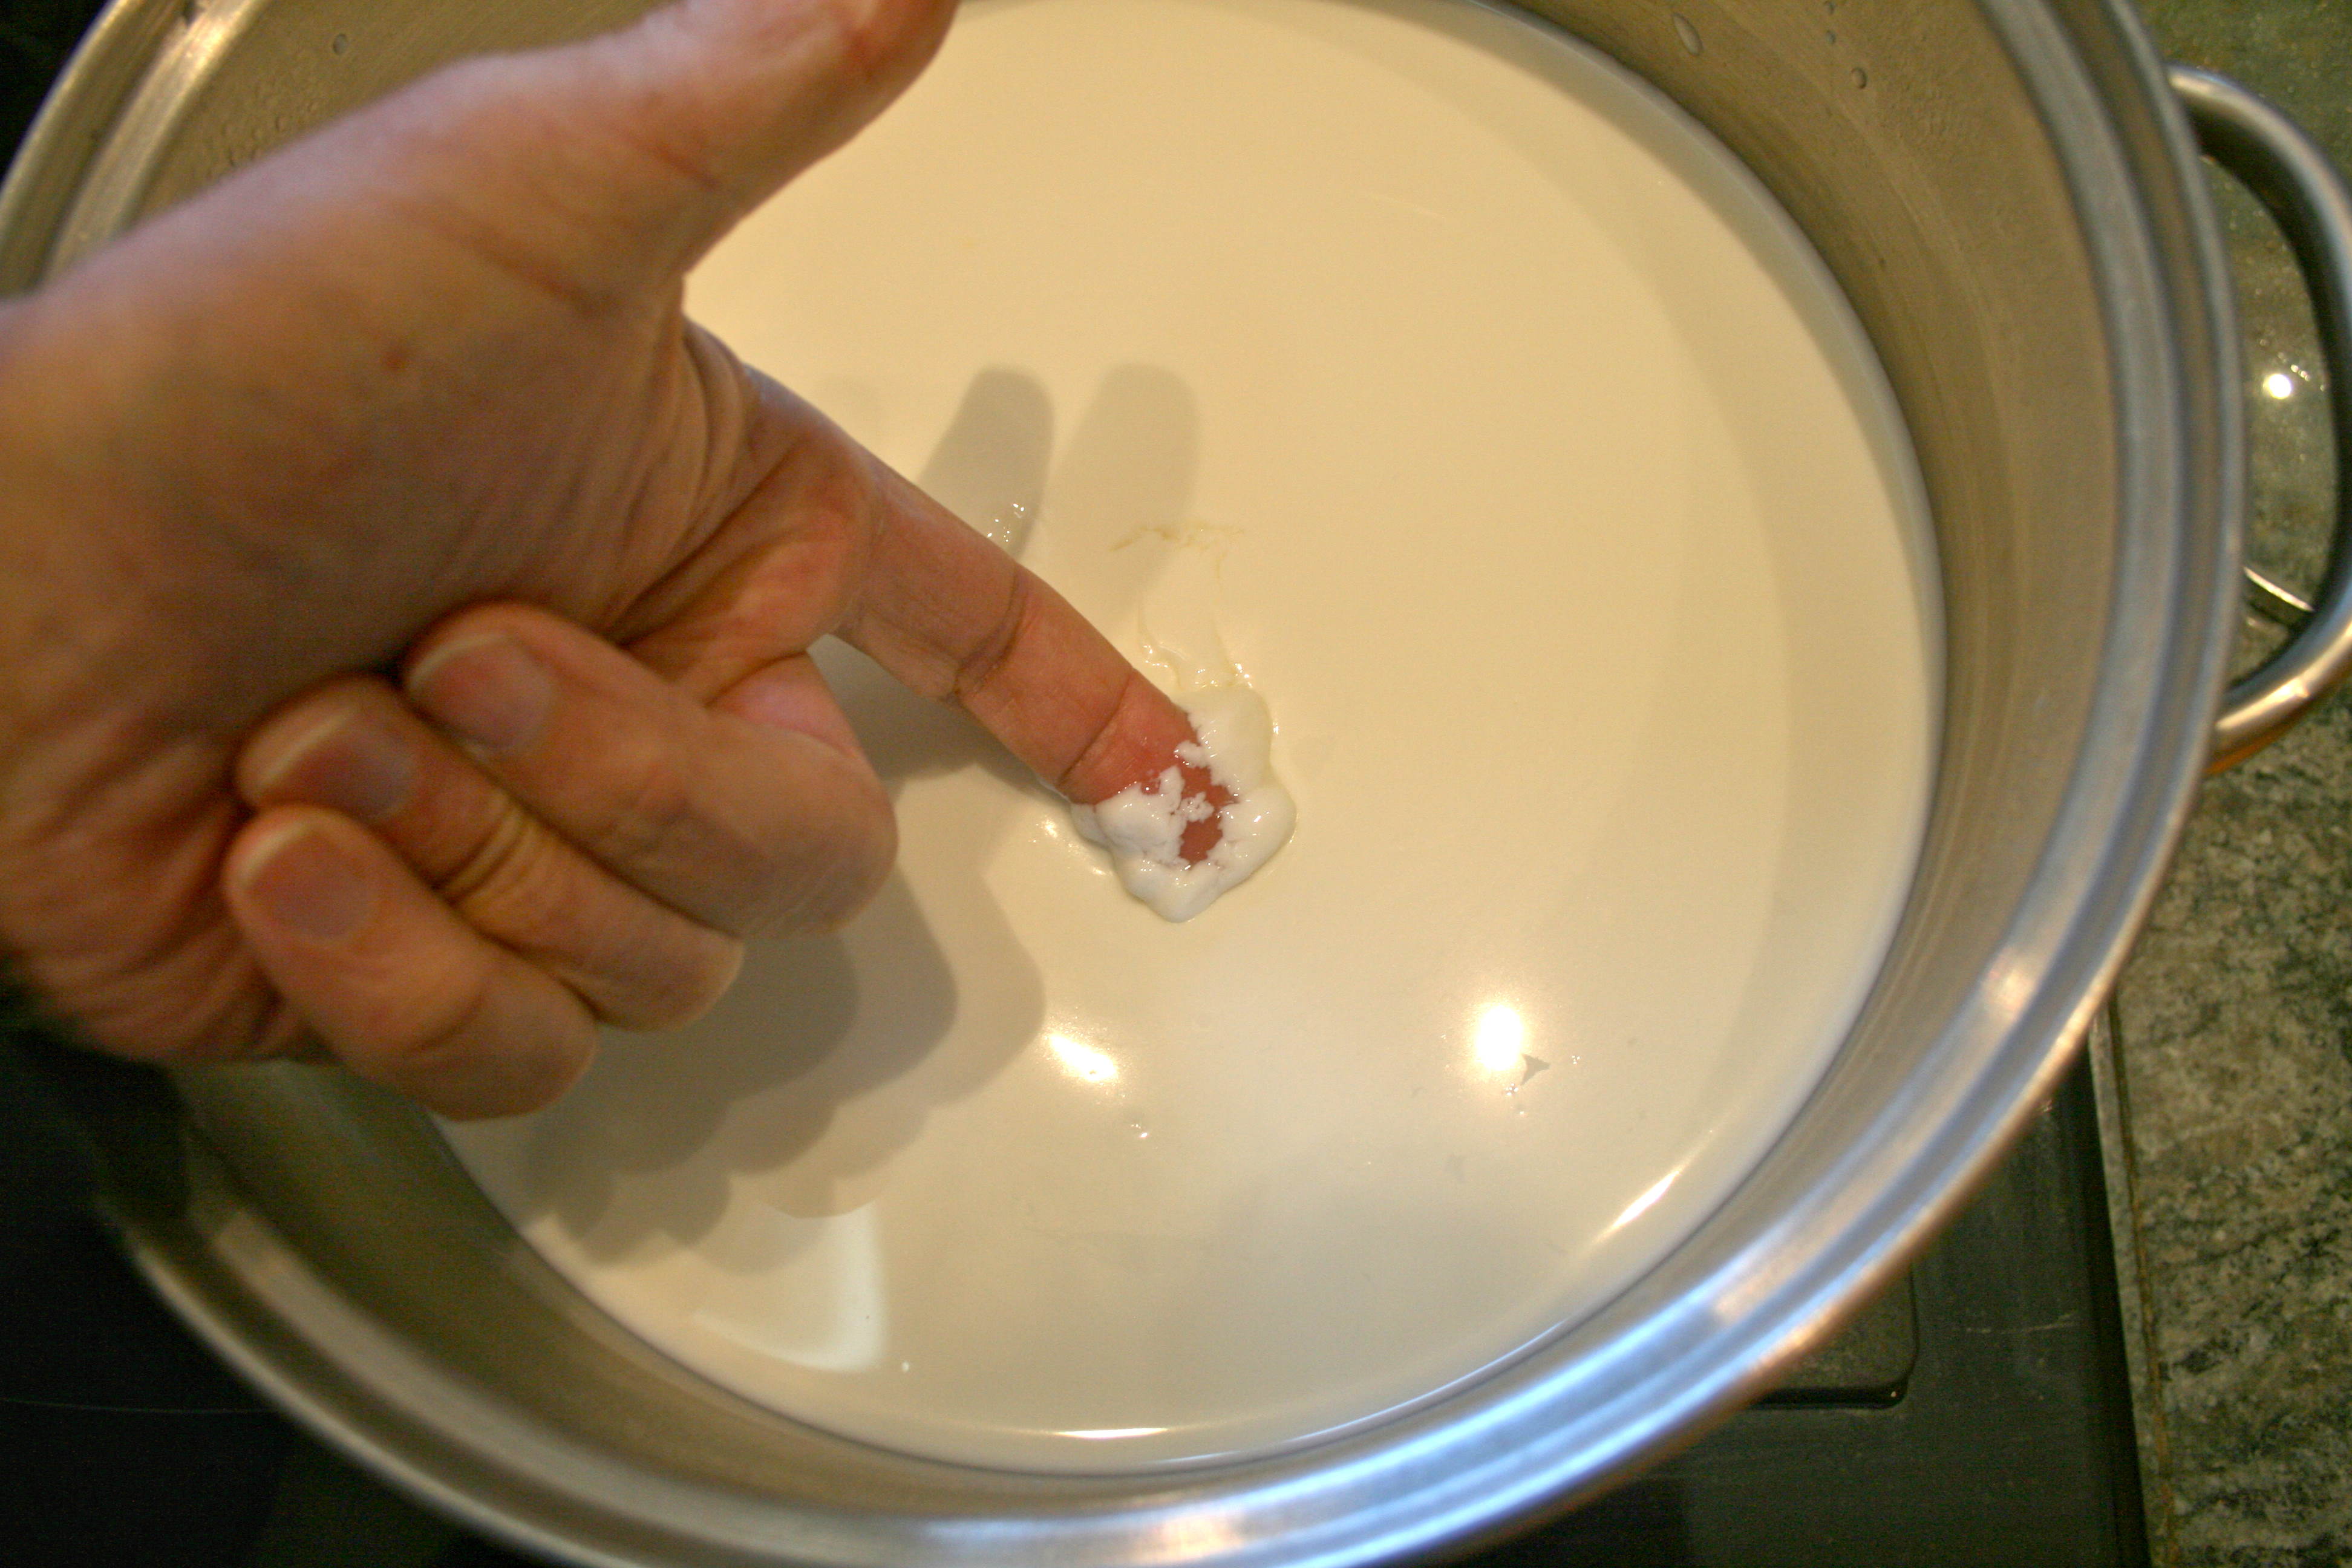
Set the pot (with the lid on) in a warm place and leave it undisturbed for one to two hours. Don't rush this step. You want the milk to gel into a nice custard, so when you put your finger into it, it breaks cleanly. How long this takes will depend on the acidity of the milk, the temperature, and how much rennet you put in. It is better to just wait than to raise the temperature, increase the acidity, or increase the rennet. This is not fast food.

When the rennet has done its job and we have a nice custard consistency, it is time to slice the custard into curds. With a knife long enough to reach the bottom of the pot, slice through the custard in half inch wide strips.

In the photo above I jiggled the pot to make the cuts visible, so they look wavy. When the pot isn't moving, they are straight.

Rotate the pan 90°, and repeat the slicing, so we have half inch square curds, like a pot full of French fries.

The next step is heating the curds so that they expel the whey. This step determines the final firmness of the cheese. I like very firm cheese, so I heat the curds to 110° Fahrenheit (43° Celsius). For a softer cheese, use a lower temperature, down to as low as 102° Fahrenheit.

For a cheese that has firm bits of dried cherries in it, you want a nice solid cheese, so that it cuts nicely with a sharp knife and doesn't fall apart as soon as the knife hits a cherry
Stir well but gently while heating on a low flame. Watch the temperature carefully, since it is very easy to overheat at these low temperatures. Don't stir so hard that the curds get too small, but make sure that the bottom of the pot is well mixed with the upper parts.

When the proper temperature is reached, turn off the flame or remove the pot from the burner. The curds need to sit at this temperature for 10 to 15 minutes, so that they firm up and lose moisture. We want them to feel like well cooked scrambled eggs. You assistant can help pass the time as you wait for the curds to firm up and sink to the bottom of the pot.

When the curds are nice and firm and have sunk to the bottom, strain them in the strainer. If the curds have not sunk to the bottom of the pot, it means that you have grown some gas producing bacteria along with the acid loving ones. While it is an indication that you did not sterilize the pot well enough, it is not a problem. It just means you will be making Swiss cheese. The gas producing bacteria will make bubbles in the final cheese.

You can rock the strainer a bit to help the whey drain out faster. You want it fairly dry for the next step.

In this step we add the two teaspoons of salt, and stir it into the curds well. The salt is not just for flavor (although that is important, we don't want this to taste like bland cottage cheese). We will be letting our cheese ripen in the refrigerator for anything from a couple days to several months, depending on how sharp you want the taste, and the salt will prevent bacteria and molds from spoiling the cheese.

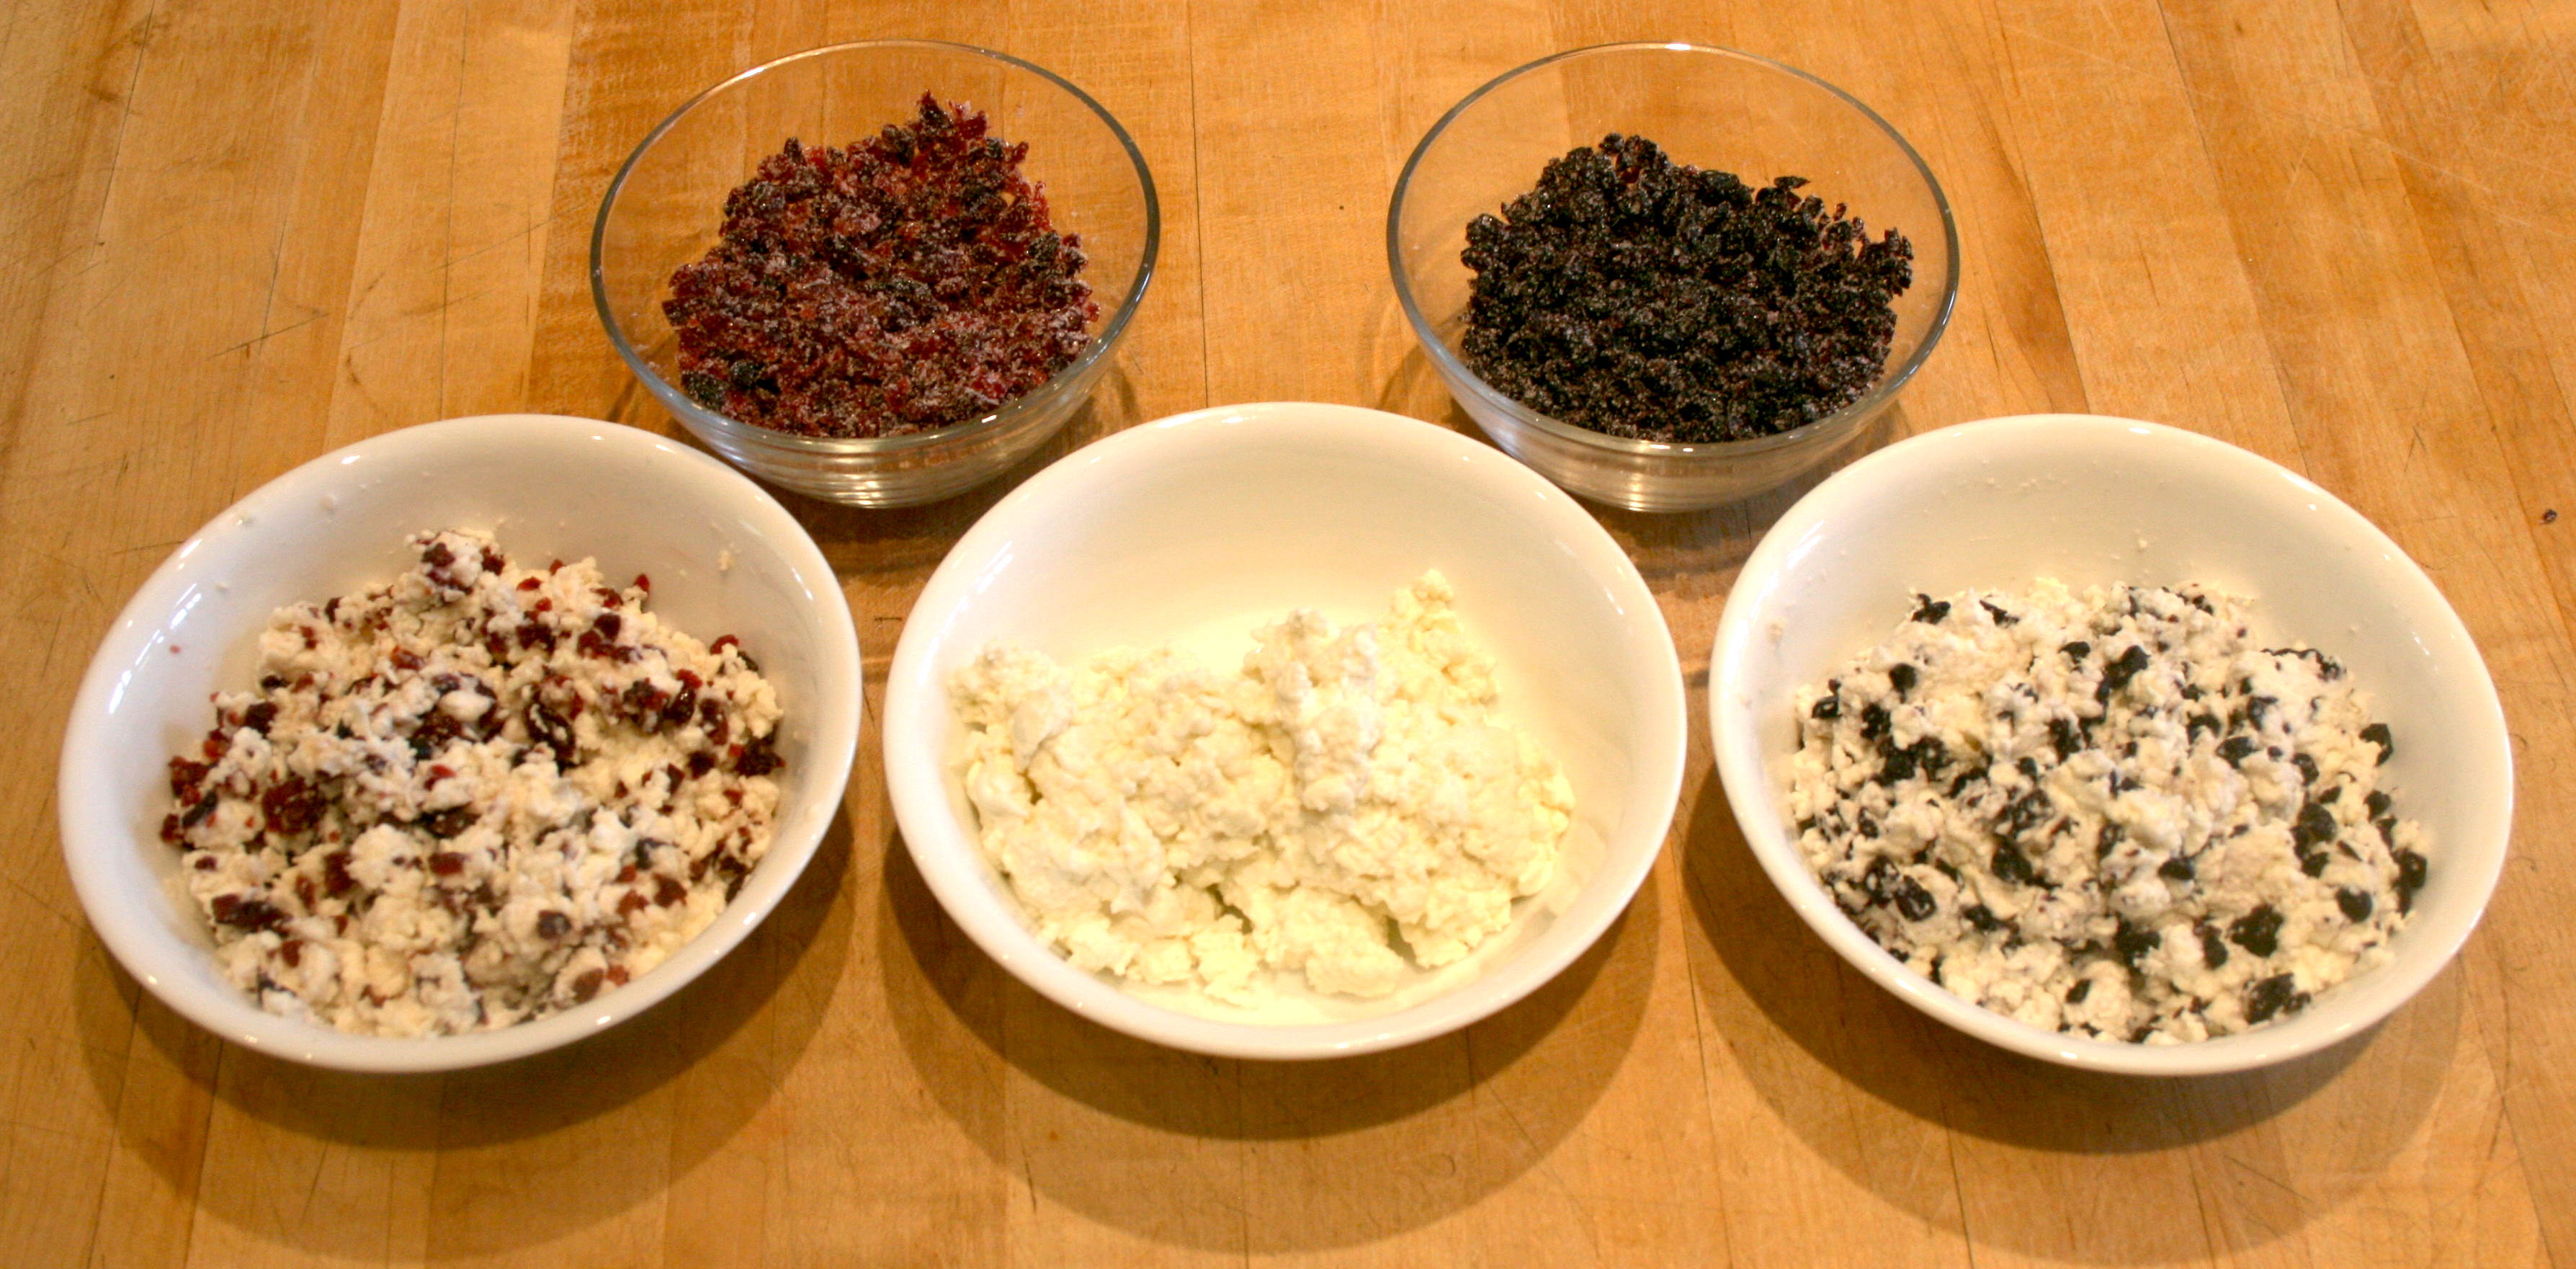
Put the half cup of dried cherries in a microwaveable bowl, and add the tablespoon of sugar, and a tablespoon of water. Microwave for a minute or two on the highest setting, so the cherries plump a little, and the sugar makes a thick cherry syrup.

Let the cherries cool a bit so you don't burn your fingers, and then stir them into the salted curds. You want each cherry to be surrounded by curds, and evenly spaced in the mix.

Place the ABS pipe in a flat bottomed bowl, and use your hand to stuff most of the cheesecloth into the pipe, leaving just a bit left out at the top so a rubber band can keep it in place while we fill the cheese press with our curds. In the photo you can see the disk I cut out of the plastic lid to act as the top of our makeshift homemade cheese press.

Now spoon the curds into the cheesecloth. When they are all in, remove the rubber band, and fold the remaining cloth over the curds. Cover with the plastic lid (or wooden disk, or whatever you found that is stiff and four inches in diameter). Follow that with a can or bottle that reaches up to the top of the press, so you can press down on it with weights.

In the photo, I used a tall plastic jar, and then inserted the handle of a dumbbell set made of plastic coated concrete.
Stack whatever weights you are using on top of the press. You want about 50 pounds. Whey will squeeze out the bottom of the press, and you will want to soak it up in some paper towels so it doesn't spill out.

After about 36 to 48 hours in the press, the cheese is ready to come out. You may need to run a butter knife between the mold and the cheesecloth to loosen the cheese from the mold, but if the curds were firm enough, you can probably just push it out without any trouble.

Carefully remove the cheesecloth. Some parts of the cheese cylinder will be fragile, such as the edges, and any parts where cherries pressed against the cloth. Be careful on those areas so you don't pull off any cheese (just to keep it looking good).
At this point you can slice and eat the cheese.
However, if you like a sharper cheese, with a nice firm rind, wrap it in a paper towel or two and let it dry and ripen in the refrigerator. Replace the paper towel with a new one every day if there is any dampness on the towel (it will probably be damp every day for the first week).
After a couple weeks the cheese will have a nice hard rind. At this point we can wax it and let it further ripen and sharpen for months in the refrigerator.
To wax the cheese, melt a crayon and the paraffin in a disposable aluminum pie tin sitting in gently boiling water in a skillet. Stir the liquid wax to evenly distribute the color.
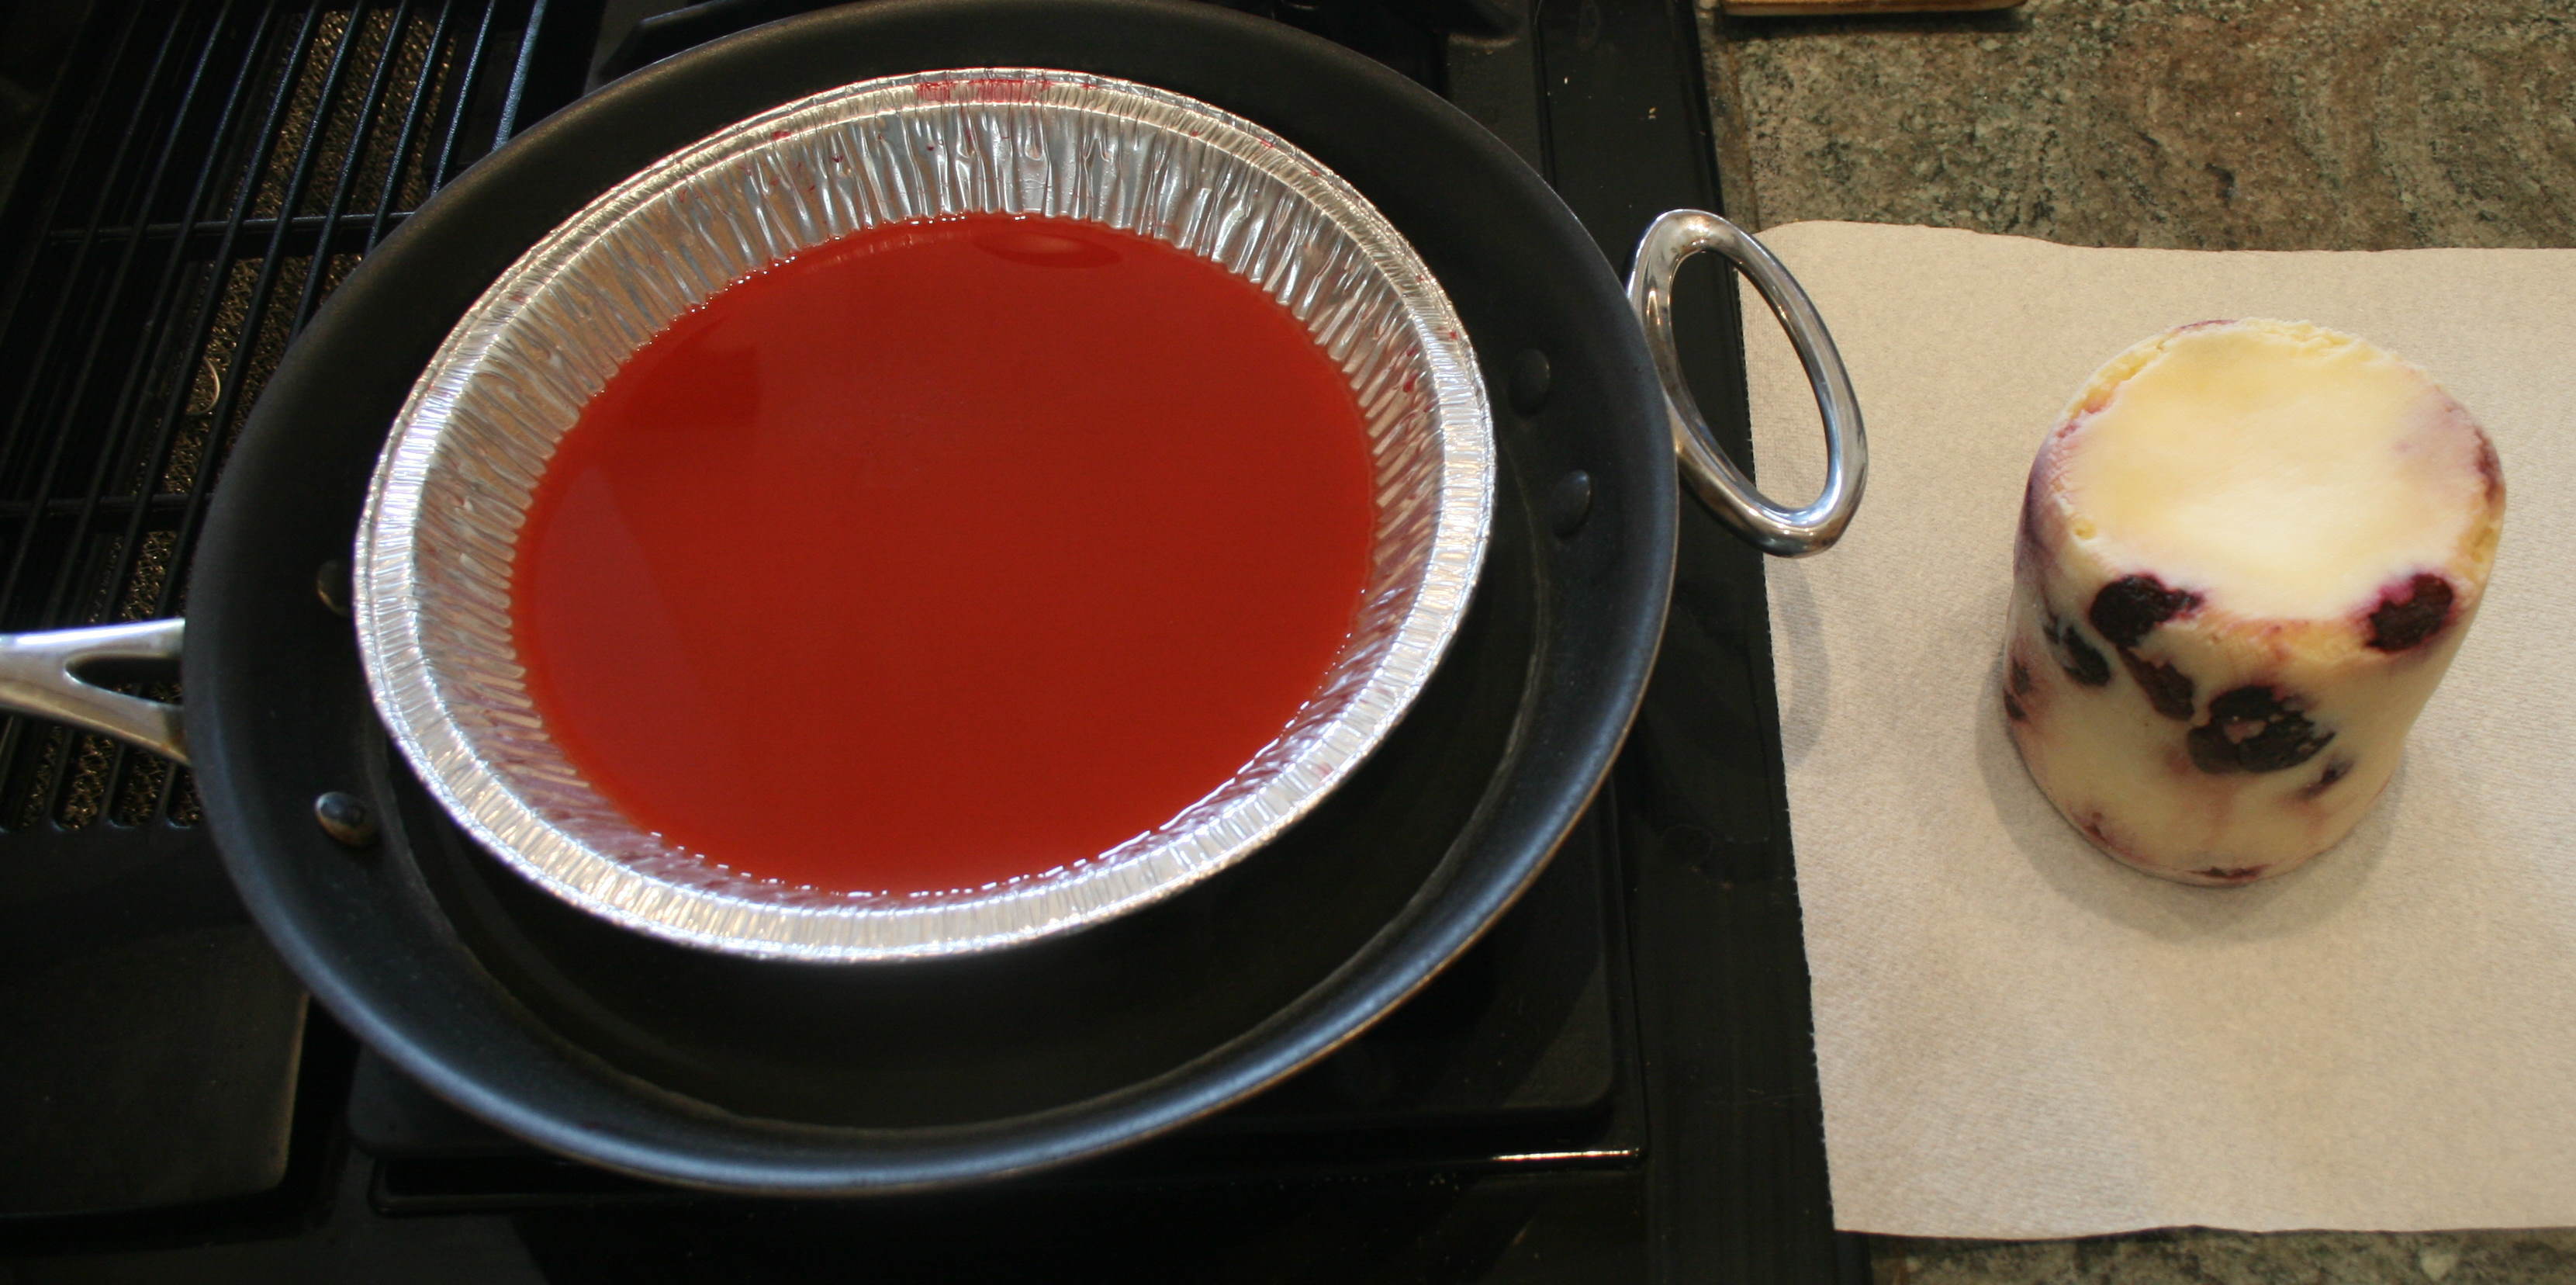
Now hold the cheese in the wax, rotating it until the sides are nicely coated with a thick layer of wax. This may take several dippings. Lastly, dip the top and the bottom of the cylinder a few times to completely seal the cheese in the wax.

You can label the cheese with your name, the date, and a description of the type of cheese, and the type of milk, and maybe even a suggested date for opening it some months in the future. Print this on a small piece of paper, and use hot wax to seal it onto the top of the waxed cheese.

A Holiday Variation
For the Fourth of July this year, we created the Red, White, and Blue Cheese.
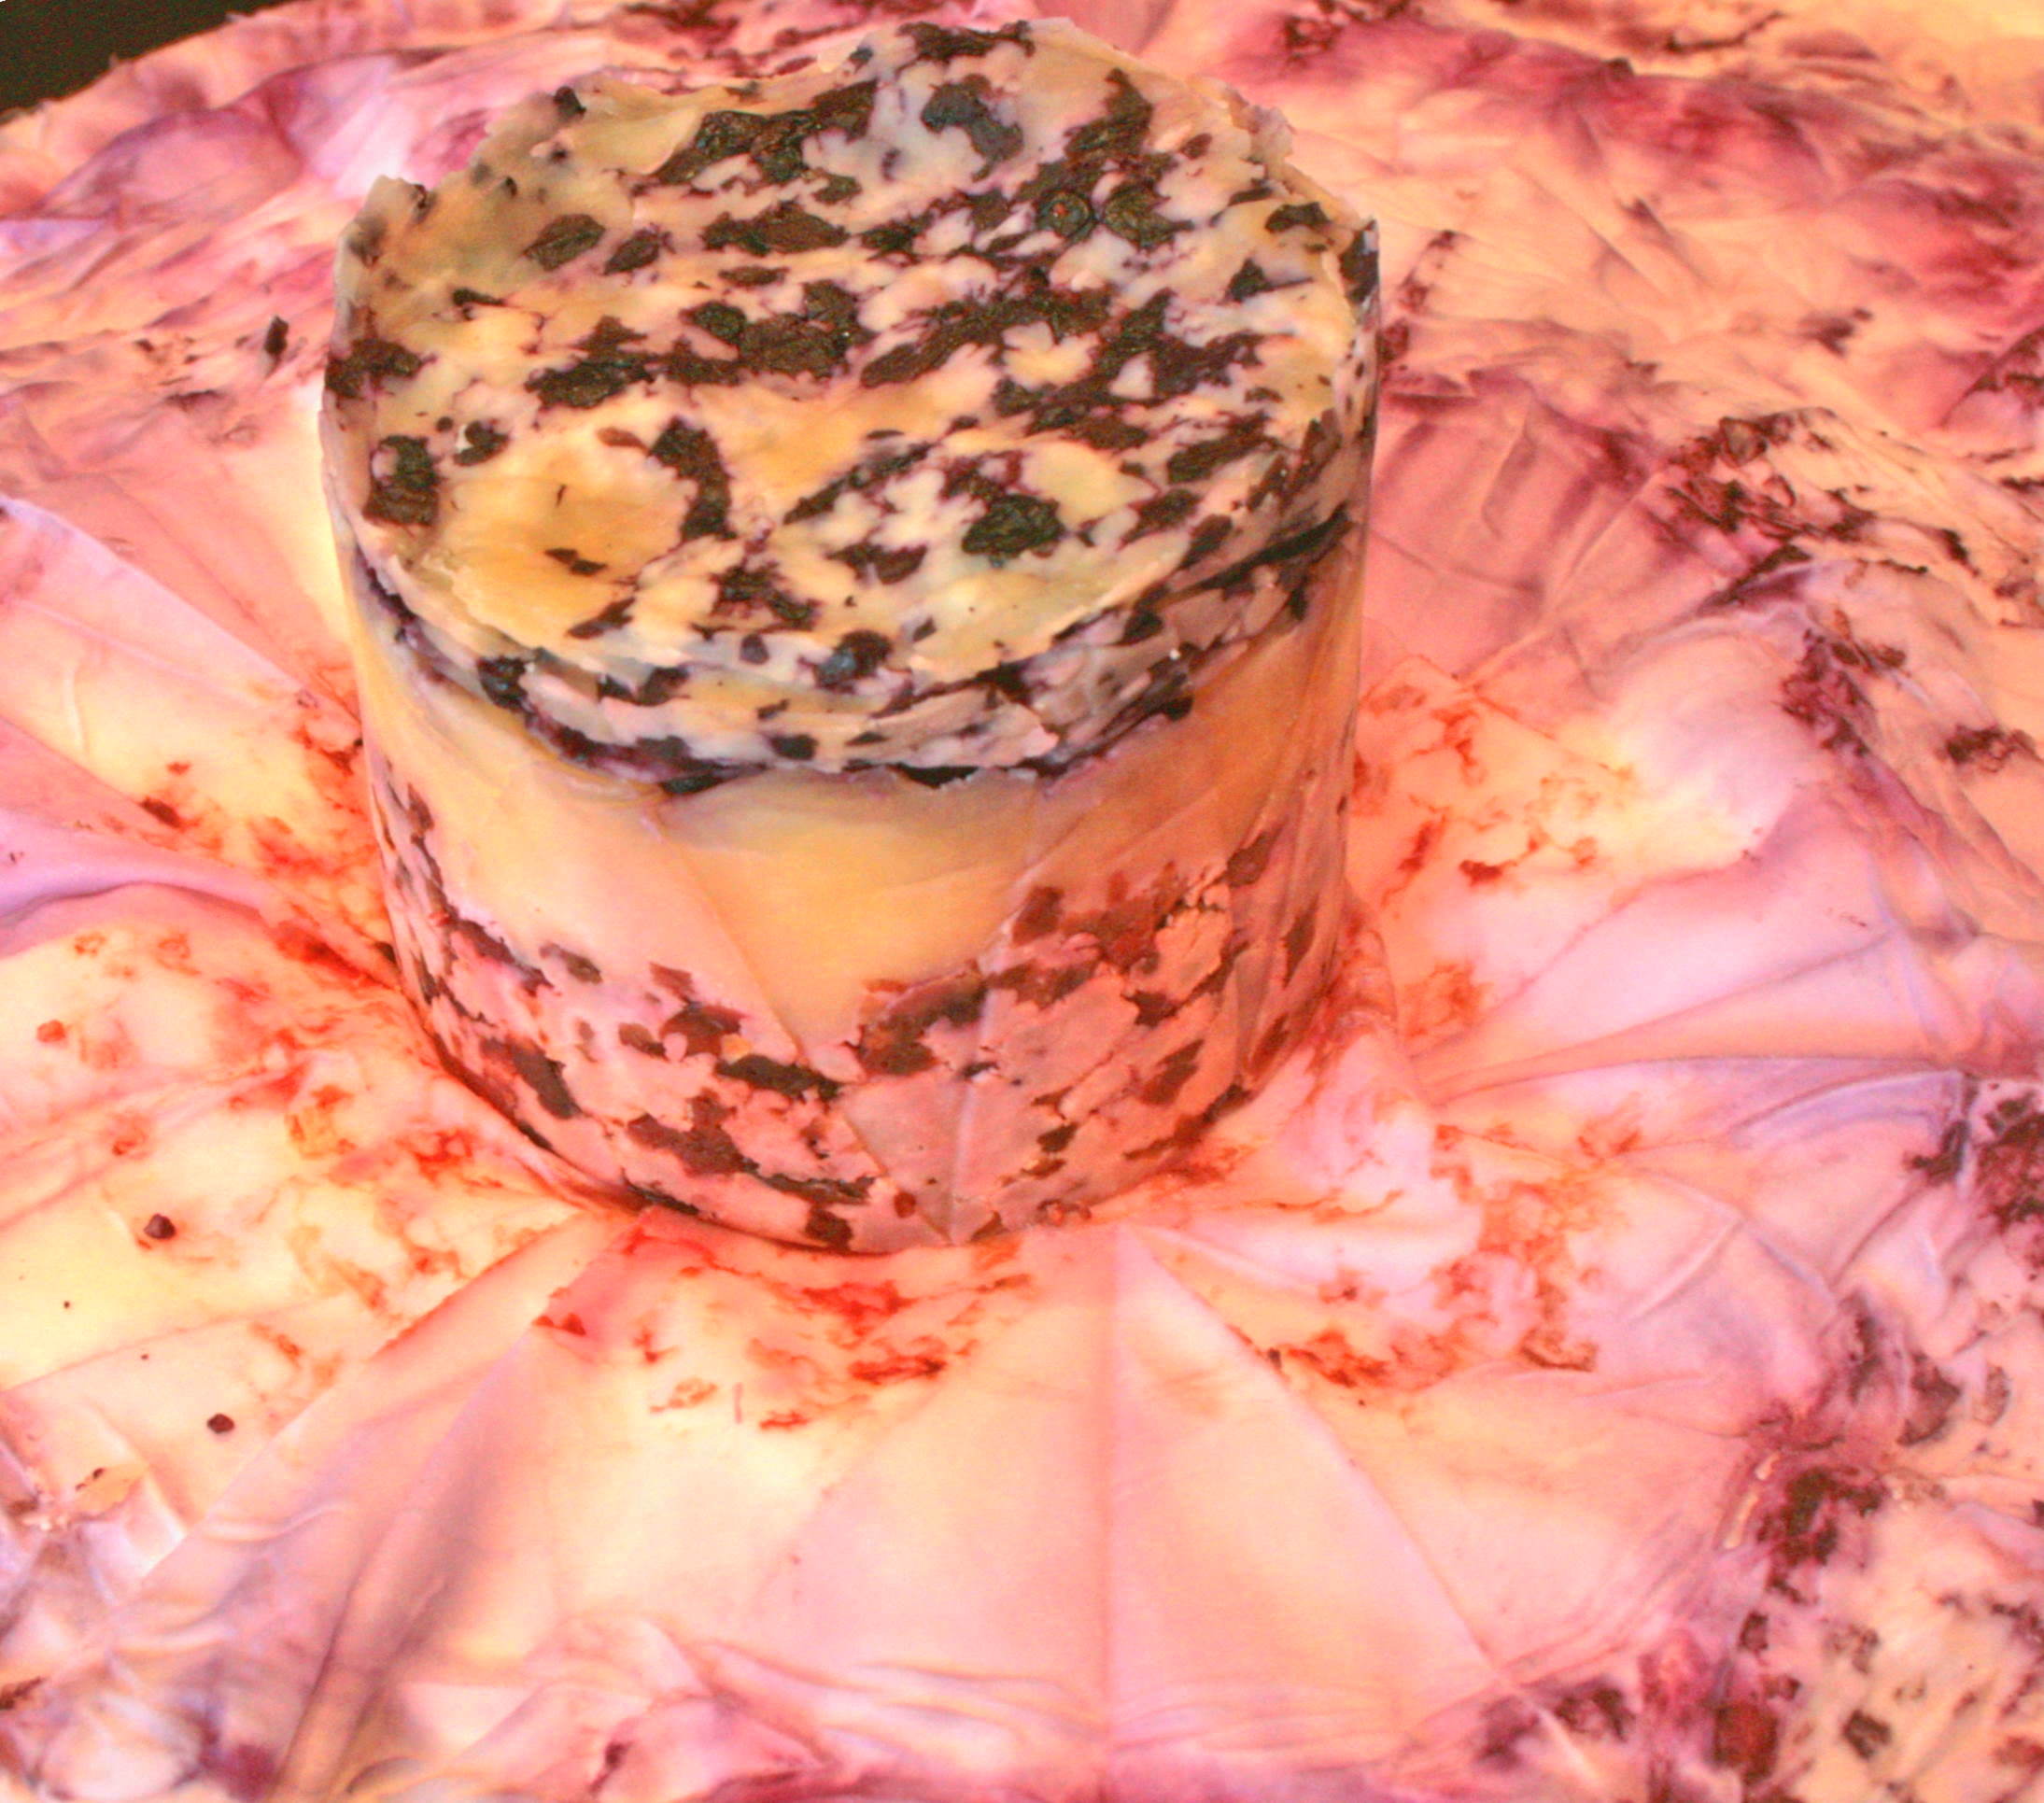
We use the same recipe as the Cherry Dream Cheese (scroll up if you got here through a link), but we divide the curds into three parts. In the first part, we add dried Bing cherries as before. However, to make slicing the cheese easier, we chop the cherries finely with a French cook’s knife, using a table spoon of granulated sugar to keep the bits separate as we chop.
The second part we leave alone, to get the white portion of the cheese.
For the third part we add dried blueberries, chopping them in a tablespoon of sugar as we did the cherries.
When putting the cheese together in the cheese press, the cherry cheese goes on the bottom. Use the disk of the press by hand to squeeze as much liquid as you can from the cheese and get a nice flat top.
Next comes the plain white cheese. Again, use the disk of the cheese press to squeeze the moisture out and flatten the top.
Last comes the blueberry cheese. Flatten it as before, then fold over the cheesecloth and set up the press as we did in the original recipe.
We used a 200 thread count bamboo/cotton cloth as our cheesecloth, and it came out beautifully tie-dyed when we unwrapped the cheese. If you use a clean white T-shirt as your cheesecloth, you can wash it and wear it to the Fourth of July picnic when you serve the cheese. The colors probably won’t survive many launderings, however.
The cheese can be served after a day in the press. This means you will want to start making the cheese on July 1st at the very latest. We plan to wax and age our cheese, so we are making it in mid-April. But we are making two batches (at least). One to age in the refrigerator, and one to eat right away. We may also make a batch on July 1st so that guests at the party can compare the fresh cheese to the aged one.